


CES Hire Ltd
CES Hire are specialists in Spray Plastering Machines supplying a variety of machines for a range of different jobs. Our plastering machines can save you time as tests have shown that the time it takes to plaster one wall can be cut in half with a plastering machine. Our plastering machines can also save you money and a whole load of manual labour when on site.
-
The Advantages of Plastering Machines
2 April 2024Traditional plastering has been around for centuries and is a process undertaken in the majority of buildings worldwide. Plastering is an essential process to achieve a smooth and durable wall/ceiling/surface finish which can subsequently be decorated. Applying this thin layer of cement-based mortar protects the structure from moisture, weathering and other environmental factors. However, traditional plastering is a huge amount of manual work which places the body under relentless strain and stress. It is also a slow process especially for larger projects and requires a great deal of precision, skill and experience. So, given the necessity of plastering, is there a better method of application that will avoid those daily complaints of aching hands, knees and backs? This is where plastering machines step in, read on as we explore the benefits of these incredible pieces of kit.
Plastering machines have been around in Europe for some time but are increasing in popularity in the UK as people realise the advantages of these machines. If plastering is a process you're doing on a regular basis, then investing in a machine really is money well spent and you will instantly notice the transformative nature of it. Of course as a one-off, why not try hiring a machine to experience the the number of benefits.
- Speed is probably one of the biggest draws of investing in a plastering machine. These machines are quick and convenient and can increase your productivity by 3-4 times. With greater efficiency, you'll be completing more jobs. We also know how much a quick job turnaround will please those customers.
- The finish you get from a plastering machine is second to none. The spray finish ensures greater uniformity and guaranteed quality with less room for human error. The machine (if complete with mixing hopper) will be able to mix to the correct consistency before spraying through the hose and spray gun. The more even distribution of plaster creates a smooth and consistent finish with less need for touch-ups. This high-quality finish is much more aesthetically pleasing which leads to increased customer satisfaction.
- Plastering machines are particularly versatile machines that can spray cement, lime or gypsum-based plaster as well as create smooth or textured finishes. These compact machines are equally easy to transport and move around site.
- Another huge advantage is the reduction in labour-intensive work. The machine is doing the hard work for you and avoiding the aches and pains associated with manual plastering. This also means less likelihood of downing tools aged 50 due to ongoing and persistent injuries (often back related).
- A plastering machine will ultimately increase your profits since you'll be completing jobs much more quickly enabling you to schedule in even more projects. You will also need less contractors on the job meaning less labour cost. Of course, you should bear in mind the initial machine outlay which is more costly than your simple hawk and trowel, however it will pay you back incredibly quickly as you turnaround jobs more speedily.
- Finally, you will find a plastering machine will leave you with a cleaner and more organised workspace. The plaster is contained within the machine ensuring there is less spillage and waste. This also is a bonus for the environment as the machine only mixes the material required.
So, all-in-all, investing in a plastering machine offers speed and efficiency and increases productivity by 3-4 times. The spray finish ensures uniformity and a high quality finish, reducing the need for touch-ups. These versatile and portable machines can handle various types of plaster and create smooth or textured finishes. They also reduce labour-intensive work and help protect workers long-term in avoiding chronic and prolonged aches and pains. If this has whet your appetite, why not check out the range of airless plastering machines on offer at CES.
-
Render Machines: A Good Investment For Your Construction Process
1 March 2024In today's fast-paced construction industry, efficiency and productivity are key factors that determine the success of any project. And when it comes to achieving these goals, render machines have proven to be a game-changer.
Rendering itself has become increasingly popular in recent times. If you walk down your street, it's guaranteed you'll spot a rendered property before too long. There are many reasons people opt for a rendered finish on their homes; the desirable aesthetic is often the main reason. Render can really be transformative and with many colours of render available and options of sleek and smooth finishes as well as more characterful textured looks, there is a style for all. Not only is style appealing to homeowners but the protective qualities also mean it is a superb options if you live in harsher climates such as coastal or exposed areas. Render also provides additional insulation to your home making it more energy efficient and saving money on those dreaded bills. Read more about the benefits of render here > The popularity of render means that you'll be never short of jobs therefore investing in a render machine could be a great route to explore.
Render machines, also known as rendering machines or plastering machines, offer a revolutionary way to apply render or plaster on walls and surfaces. One of the major advantages of using render machines is their ability to work at an incredible speed. With their automated features and precise control, these machines can cover large areas in a fraction of the time it would take a team of workers to hand apply. With machines such as the Euromair MixPro 28 which are a continuous mixer pump, you needn't even mix the product yourself, just break the bag of powdered material and away you go. This means that projects can be completed faster, productivity increases and deadlines can be met with ease. At CES, we provide training alongside machine purchase which means you'll be set up to spray the very next day if needed. We are also available at the end of the phone for those technical questions as you become accustomed to to machine applying.
Machine application also offers health and wellbeing benefits for the user. As with much machine application, the pump takes the strain away from your body by doing the hard work for you. The construction industry can really take its toll on the body so anything you can do to reduce the stress is worth it. Using this less labour-intensive method will mean you can keep working for longer whilst maintaining a healthy body.
Moreover, render machines offer a consistent and uniform finish, which is hard to achieve with manual methods. Spray guns apply with great accuracy ensuring the render or plaster is sprayed evenly across the surface, eliminating any imperfections or unevenness. This not only enhances the aesthetic appeal of the building but also improves its durability and longevity.
Another significant benefit of investing in render machines is the reduction in labour costs. By replacing manual labour with automated machines, construction companies can significantly cut down on the number of workers required for a project. This not only saves money but also reduces the risk of injuries and accidents on-site, ensuring a safer working environment.
Furthermore, render machines are highly versatile and can handle a wide range of rendering materials, including monocouche, fire protection, traditional mortar, grout, EWI systems and pre-bagged screeds. They can also adapt to different surface textures and finishes, providing flexibility and customisation options for construction projects. This versatility allows contractors to cater to the specific requirements and preferences of their clients, ultimately enhancing customer satisfaction.
If you specialise in rendering, purchasing a rendering machine is a great investment. If your construction business tends to dabble in different areas of construction then hire may be the way to go. However if your committed to specialising in this one process purchasing a machine is different going to save you money over time. Hire costs can soon stack up especially if you are working on a long-term project. Don't forget, CES offer a trial hire scheme in which you can essentially try before you buy. This is a great option to explore if you're new to machine application. Find out more here >
In conclusion, render machines are undoubtedly a good investment for any construction process. Their speed, efficiency, and ability to deliver a flawless finish make them an invaluable asset in today's competitive industry. By embracing this advanced technology, construction companies can streamline their operations, save time and money, and ultimately achieve greater success in their projects.
-
Sustainable Projects: The Environmental Impact Of Flow Screed
1 February 2024Many contractors are discovering the brilliant benefits of flow screed from superior finish, quicker drying times and speedier install. There is also another positive point to consider and that is the eco-friendly credentials of flow screed. With the carbon footprint becoming a key factor in building design as construction strives to achieve net-zero, selecting flow screed as your chosen flooring product can be beneficial in the building process. Read on to find out more about this 'green flooring' solution.
Reducing Carbon Emissions
With climate change at the forefront of planning and policies, considering how your product is sourced is vital. Concrete has a much larger carbon footprint compared to flow screed due to the production of the material. Cement produces considerably more carbon emissions since it must be quarried/mined followed by heating and crushing and kiln burning at excessive temperatures of 1450°C. Producing liquid flow screed uses less energy consumption as flow screed uses the binding agent calcium sulphate in place of cement. This is made from naturally occurring gypsum which is both recyclable and requires less energy to process. Flow screed is generally made up of some proportion of recycled materials (this can vary from between 40-98% depending on your product choice). Often recycled sand is used as a replacement for natural sand.
Eco-Friendly Install
The environmental benefits continue when installing flow screed. Far less energy is used in the application process as it is laid at a much thinner depth as well as being a lot quicker to install. Flow screed can be laid as quickly as 2000m² per day where as traditional screed can generally lay a maximum of 150m² per day. With application of flow screed being more accurate this often means less wastage which benefits the environment. Find out more about the benefits of Flow Screed and how is compares to traditional screed here >
A Greener Way to Heat Your Home
The thermal conductivity of flow screed means this eco-friendly solution extends into it's usage with the homeowner. Flow screed completely encapsulates any underfloor heating pipes/cables allowing more efficient heat transfer. Consequently less energy is required to heat up the floor and there are much lower running costs in the long term.
Find out more about the screed pumps we offer on a hire basis at CES .
-
Machinery Lifeline: The Unseen Value Of Regular Services For Peak Performance
1 February 2024When it comes to any machinery we have the expectation that it will work when we expect it to especially when it's often an expensive outlay. However, even if they have cost hundreds or even thousands of pounds, machinery can partially or completely fail without warning and it's entirely out of our control. One thing we can control is the how we maintain and service our machines which can prevent sudden breakdowns. Read on to find out the benefits of regular servicing.
Learn More About Our Machine Maintenance Services
Types of Servicing/Maintenance
When it comes to maintenance, we all know the saying prevention is better than cure Preventive maintenance is servicing that is carried out regularly even if your machine is working absolutely fine. This will mean inspecting your machine for wear and tear and repairing/replacing parts as necessary. Maintaining your machine in this way helps prevent major failures which can be more costly and disruptive. By booking your machine for a service in this way, you can plan the timing and factor in the time it will take to be checked causing no interruption to your workflow and projects.
Predictive Maintenance may require you to be in tune with your machine and its capabilities in order to foresee when a service may be needed. This may be based on number of hours or the number of jobs completed. Again this is a planned service so you are in control and will be able to take into account a time that suits you and your workload.
Corrective Maintenance occurs when machines break down and these machine repairs are often more expensive. A sudden breakdown can be very disruptive to your installation process. Not to mention you may not be able to be fitted in immediately by a service centre causing further time lags on your project. A break-down mid spray will likely cause inconsistent render/plaster/paint finishes as well as an unhappy customer. An unexpected failure may incur further costs if you need to hire alternative equipment to keep up with your workload as well as the repair costs.
The Benefits of Machine Servicing
Machine servicing is invaluable with multiple benefits. By regularly maintaining your machine, you'll extend the lifespan of your equipment, getting even more for your money. You will also lower the risk of sudden breakdowns by keeping on top of how your machine is wearing. Whilst decreasing your likelihood of unexpected breakdowns, you'll also be preventing unplanned downtime on your job. A healthy, well-looked-after machine will improve the efficiency of it as well as reduce operating costs since your machine is working at optimum level. A carefully serviced machine will improve productivity producing a higher quality output and importantly very happy customers. A looked-after machine promotes health and safety in the workplace ensuring accidents are less likely to happen. Overall, you will save money through a longer machine lifespan, less unexpected repairs, better machine efficiency and improved productivity. As a business, a clean well-maintained machine will boost your company image, hopefully leading to more work.
What else should you Factor in when Booking a Service?
If you own just one machine which is critical for your business and livelihood, planning in your servicing is crucial so that you can factor in jobs around the servicing down-time. Consider how old your machine is since older machines may require a little more TLC. The environment the machine is used in will have implications on the servicing frequency. If it's used in harsher weather conditions or exposed to dust/moisture, it will require more frequent maintenance. It can also be a good idea to take into account the time of year since servicing centres can get incredibly busy during the peak rendering (spring/summer) months; if you can, perhaps book your machine in during the colder months when companies like CES may have more time to fit you in as well as your workload potentially being a little lighter.
-
The Power of Drop Film in Safeguarding Your Projects
1 February 2024Preparation and clean up is always the least exciting element of a project. How many of us just want to get going on the job and see results? However, without taking the time to prep properly, the clean up can become a real hassle and take more time than it should. Anything that can simplify and speed up your preparation is a big win and this is where the power of drop film comes in.
What is Drop Film?
Drop Film or masking film is more of a specialist product, not necessarily one you'd find at the local DIY store. However it is well-worth getting your hands on some. Drop film comes on a roll with a pre-taped edge along a folded polythene cloth. Once taped onto the desired surface, you can then unfold your polythene sheeting which comes in a variety of drop lengths according to the space you need to cover. At CES we offer 6 drop lengths, 550mm, 1100mm, 1400mm, 1800mm, 2100mm and 2700mm (many on a 20metre roll).
What can Drop Film be Used for?
Drop film is an incredibly handy product within many trades; painting and decorating, plastering and rendering. It is used to mask off large areas of your project. It is a really versatile and handy product as it can be used to cover walls, floors, furniture and windows. It then protects these areas from potential drips, splashes, sprays and general dirt and dust. This means tidying up after your project is straightforward without annoying additional clean-ups.
The Benefits of Drop Film?
Drop Film is a must-have project that really saves time when it comes to preparation and clean up and ultimately protects your project from drips, splatters and splashes. With the pre-taped edge it can quickly and easily be applied by one person. The combined tape and polythene sheeting also means no messing around with separate masking tape and polythene sheets which can be quite a nightmare. The tape will adhere to your surface for up to 30 days without leaving any residue. The lightweight roll-out polythene sheeting is easy to unroll and cut to cover your area plus the plastic material creates a static cling meaning it completely masks your area. The static properties also attract dust and dirt preventing it sticking to your fresh paint, plaster or render. Clear polythene is also perfect for windows or doorways as it still allows the light through. Drop film also offers UV protection.
-
Looking After Your Machine in Winter
1 February 2024During winter, breakdowns on your rendering or plastering machine, grout or flow screed pump can become more common. The harsher weather conditions can take their toll on your machine and if they are sat not working for a while due to freezing temperatures this can affect them further. Rain, frost, ice and snow can be detrimental to your machine however there are steps you can take to avoid mechanical issues and keep working throughout the winter. It is worth noting that rendering is not recommended below 5°C.
Prevention is Better the Cure
Machine Maintenance is even more important during the winter months so problems can be recognised before they escalate. Preventative care will increase the longevity of your machine and decrease your expenditure on sudden faults and breakdowns. You should train your team to carry out daily inspections to spot early signs of stress; check out our blog which gives you a more detailed breakdown of visual inspections and daily checks >. If your pump is a towable unit, include checking the tyre pressure in your regular checks since tyres can loose air more quickly in cold conditions.
It may also be worth scheduling in pre-winter inspections or servicing to ensure your machine is ready to withstand the more extreme winter conditions. Even simple steps such as keeping your machine clean will help with protecting the body and components as well as ensure you can more easily spot faults.
Safe Storage
Correct storage of your machine is key during the winter months. If your machine is outdoors it will be exposed to the elements. If rain, snow, frost gets into your pump , it can affect the electrics and even on a diesel machine, the additional water (rain, ice, snow) will impact it. An enclosed, weather resistant storage area is recommended to keep your machine safe and in good working order. Cold temperatures affect wiring, hydraulics and hoses as these parts can become brittle and susceptible to cracking or bursting. Not only is the damage to your machine going to be costly, it will of course prevent you from carrying out your job and crucially can cause a danger to the machine user. Batteries are another element that require warm storage. Cold weather caused rapid depletion of stored energy in batteries, a decrease in capacity and charge potential. If any of your machines run on battery power, be mindful that in winter they have to work harder to start up. Try and keep batteries warm and fully charged.
Draining
An essential part of winter maintenance is draining down your machine. The drop in temperatures could cause water to freeze and subsequently expand which may mean parts of the machine crack and are damaged. To drain down your machine you need to open both drain taps as well as the water outlet and allow the water to flow out. If you have a water pump, you should also drain this. It can be worth having a spare water bowl as this can be liable to crack in chillier weather.
Warm Up
In winter months, it can take your machine much longer to warm up so allow this time so it can reach optimal working temperature. This also gives the wire, hydraulics and hoses time to regain flexibility. Allowing time to warm up increases your machines efficiency and subsequently the lifespan. When machines remain unused for longer periods of time, it can be harder to fire them up. If possible start your machine up approximately every 3 days in downtime to make sure parts don't lock up. Applying lubricant and ensuring you are greasing up working parts of your machine will also help. With diesel pumps ensure you use anti-freeze in the radiator.
Rotors & Stators
Rotors and stators are an essential element to keep your machine working at its best. These parts can also be affected by cold weather and have a habit of seizing up when it's cold and can be virtually impossible to take apart. We would advise you to take your rotor and stator apart in cold weather or if you're not using your machine for a prolonged period. Alternatively ensure you sufficiently lube up your rotor and stator to prevent it locking up.
If you're keen to keep rendering throughout the colder months, check out our blog The Winter Weather Watch: Render in Cold Weather.
-
The Winter Weather Watch: Rendering in Cold Weather
1 February 2024British weather; how often do we check, discuss or moan about it? If you're a renderer being on the daily weather watch is simply part of the job to ensure a sound and flawless render application. As well as looking after your wall, materials and machines or tools, it important to also look after yourself in colder temperatures and dress appropriately. Find out why you need to take extra care when rendering in cold weather and our top tips on rendering in winter below.
Ice, Ice Baby
Rendering should always be carried out in temperature of 5°C + and should never be done in frosty conditions. If your substrate is lined with frost this will affect the bond of the material to the wall. Also, since water is added to pre-bagged plaster and water freezes at 0°C, be aware that freezing temperatures can affect your material and therefore the structural integrity of it. Take into account your water feed too as water from the mains may be too cold; we would suggest using a water butt.
You should consider the weather surrounding the day you're applying. Your substrate can retain freezing temperatures for longer than you think especially if it's been a prolonged cold spell. Lengthy periods of cold weather can mean that your render does not fully dry. This is because the water cannot evaporate and moisture becomes trapped in the material; slower water absorption compromises strength. It is also important to check the subsequent days to ensure you're allowing at least 48 hours of drying time at about 5°C. Try and keep temperatures as constant as possible since fluctuations can cause movements in the substrate.
Wet, Wet, Wet
Rendering in the rain is also a no, no if you're not adequately protected. Rain can cause inconsistencies in the render, weak material as well as wash the render off entirely. If your substrate is saturated this with reduce the bond of the material to the wall and can cause lime bloom. Lime bloom occurs when render is exposed to damp or low temperatures in early curing stages. The cement in render does not work well with damp and slow drying conditions and a thin white film can form on the surface. Whilst lime bloom does not affect the structural integrity of your render it looks somewhat unsightly. If the wall is saturated, shrinkage whilst drying can cause movement and subsequent cracking of your render.
Our Top Tips on Coping in the Cold
Wrap Up: Working outdoors can have it's benefits when you're working in the sunshine on a beautiful spring day. However, there are the downsides of working outside when it comes to winter. It's important to keep yourself warm by wearing suitable insulated clothing including socks, boots and gloves. Wearing multiple thin layers is also advisable so you can remove or add to if you warm up/cool down. Keep a stock of barrier cream or moisturiser in your toolbox to protect your skin.
Storage: It is crucial to store your material correctly keeping it raised (on pallets) and away from cold floors. You may find that that keeping it closer to buildings is slightly warmer or ideally keep in storage. Equally keep your tools stored somewhere warmer to ensure they remain flexible and easier to work with when applying and finishing. Keeping them indoors also protects from frost, rain and potential ice. When cleaning your tools in winter ensure you dry them sufficiently so any water doesn't freeze.
Protect your substrate: In order to protect the wall from frost or rain both prior and post application, tent your scaffolding which protective sheeting whether that be tarpaulins, close mesh netting, polyethene or debris netting. Any sheeting should hang clear of the wall but so it is not forming a tunnel as this can create a channel of wind and increase the evaporation of water from the render.
Raise the Temperature: You could raise the temperature with the use of heaters however should ensure they are not directly pointed to the wall. The other way to trick your render into thinking it's a 20°C summer day is by using accelerator. Accelerator is an additive which is used at the mixing stage and speeds up the curing time.
If you're ever in doubt on whether it is too cold to render or you don't have a clear window of warm enough curing weather, it is always best to postpone rather than risk a sub-standard render. Consider as to whether you could continue on another part of your project for example working indoors with screeding floors.
-
2023, that's a Wrap!
2 January 2024And that's a wrap for 2023. Please take note of the above dates and times for our Christmas closure. We are completely closed between Christmas and new year to give our hard working team a chance to rest, recoup and spend time with family and friends. Any current hires will be suspended during this period as we are unable to offer our usual servicing and technical backup whilst we're closed.
If you missed it, this year has been a milestone year with CES celebrating 40 years in business as well as Ben stepping up as the MD whilst Nick has taken a step back into the role of company chairman. In celebration of our 40 years, our Christmas card was inspired by the 80s. The fantastic ImageBox Design created this superb e-card featuring the whole CES team transformed into 80s icons. Can you spot which 80s popstars feature and which CES team member has become that icon? 'Tonight Matthew I'm going to be...'
Continuing in the 80s spirit, here is a final message to all our wonderful customers. How many 80s songs have we managed to squeeze in?!
As the Christmas Holiday draws near
it’s time to reflect on the year.
One that was Simply the best,
So let’s dance an 80’s fest!
Dancing on the ceiling like a pro,
We celebrated turning the big 4-0.
We’ve signed, sealed and delivered on many a machine,
What a wonderful world of rendering this year we’ve seen,
So, thanks to all our customers for coming back to us,
We’re always here to help without any fuss,
No matter what the weather, fog, wind or sun,
Or even purple rain, we’re here for plastering fun.
I’m still standing, I don’t know about you?
It’s been a busy year but we’ve seen it through.
We hope we’ve helped when you’ve felt under pressure,
Looking after your pump and giving it a refresher,
With a Kind of Magic from the CES Team,
Keeping you Forever Young and always living the dream.
Do they know it’s Christmas Time? The countdown is now here,
We hope you’re feeling festive as we see out the year,
To our customers and suppliers Merry Christmas to you all,
Cheers to Christmas celebrations we hope you have a ball!
-
Seamless Surfaces Made Simple: The Power Of Render Beads In Your Project
2 January 2024Render beads are an essential element in the rendering process. They reinforce your render system, protect edges, strengthen potential weak spots and prevent against water damage and cracking. There are various types of bead or trim that have different jobs within your render application. In this blog we'll explore the range of render beads, look at the benefits of render beads and give you guidance on how to install the beads.
What are render beads?
Render beads are a key part of professional render installation and essentially are vertical mouldings that support your render system. They come in long strips (usually 2.5 metres) and are therefore cut to size for your job. At CES we supply the PVC beads however you can also find metal versions.
Why use render beads?
Render beads are essential for strengthening and supporting your render as well as improving your overall wall finish and the durability of the render. Areas such as edges and reveals can be potential weak spots which are more easily damaged, therefore installing render beads will help to strengthen and protect these areas. Beads will also help protect against water damage, staining and cracking and generally give reinforcement and definition to your walls.
PVC or metal?
Plastic/PVC beads as well as being more cost effective also have many other benefits. Plastic is lightweight and easier and safer to work with. The plastic can be cut to size simply using tin snips and can be purchased in colours to match your render. Metal beads, whilst being a strong material can discolour and rust over time causing unsightly marks and damage to your render. Metal can also expand which may cause your render to crumble off.
Different types of render bead
Render beads have different purposes according to the area of the wall you're reinforcing. At CES we stock corner, stop, expansion and bell-cast beads in 10, 15 and 20mm widths.
Corner beads
Corner beads, also known as angle or quoin beads, as the name suggests are used for corners. Corners are more exposed areas and can be susceptible to knocks . As a weaker area, they should be reinforced with a corner bead. This bead will not only provide strength but also eliminate the need to manually create a corner. The nose of the bead ensures a perfect 90° angle as well as a crisp line and sharp finish. You can buy corner beads without mesh for use with scratch render or with mesh for thin coat render application.
Stop Beads
A stop bead is applied at the edges of thin coat render for example besides windows, door frames, soffits or cladding. It protects the render against impacts as well as creating a clean edge. A stop bead can also be used to create a decorative feature panel.
Expansion Bead
Expansion beads or render movement beads are used on large expanses of render to break up long stretches of surface and provide additional strength and support. They are installed vertically and prevent cracking, chipping caused by thermal expansion and contraction. They also provide support where different substrates meet.
Bell-cast beads
Also known as drip beads, bell-cast beads are fixed within the basecoat and create an angled lip at the base of the wall. This allows water running down the walls to drip straight off. The lip diverts water away from the bottom of the render or wall preventing damp issues occurring or condensation build up.
How to install render beads
Before you begin the installation process, you must ensure your surface is clean, dry and debris free. The render beads will also need cutting to the desired length using tin snips. To apply the trims, you should place dabs of bead adhesive or basecoat render to the substrate around 300mm apart. The dabs of adhesive should be wide enough to spread across the width of the bead wing. Next press the bead firmly into the freshly applied dabs and then remove any excess render/bead adhesive with a trowel. Now you're ready to continue applying the render across your prepared surface.
-
Winter Winners: How Render Accelerator will help you this winter
1 December 2023We live in a world where we have high expectations and believe nothing should stand in our way, least of all the weather! When it comes to rendering we also want to be able to render all year round. Pressures from customers and project managers will also demand that we work in every season even in colder temperatures. Luckily with the wonders of modern technology and genius products like render accelerator we can continue working in cold winter temperatures.
What is Render Accelerator?
Render Accelerator is a liquid additive that is added to the render itself in order to speed up the rendering process. It works by decreasing the curing time which is particularly helpful in winter when colder temperatures mean slower drying times and increased water retention in the material. Depending on the product you are using it can cut the drying time in half! Essentially the render will be tricked into thinking it is a spring/summer day of around 20°C reducing waiting time and enabling you to scrape/finish more quickly. At CES we stock accelerator for monocouche as well as thin coat render.
How render accelerator works?
Render accelerator is generally used in colder months between October and April in temperatures of 5°C and above or for colder climates. Guidance would advise not to use render at all in temperatures below 5°C due to products freezing and this compromising the integrity of the materials. Render Accelerator creates a chemical reaction within the render which speeds up the drying process. It encourages quicker hydration of the cementitious components within the render mix. It is an easy product to use and is simply poured directly into the render. It must be thoroughly mixed and always read the manufacturers guidance to ensure the correct quantities are used and that the accelerator is compatible with your render.
The benefits of render accelerator
- Reduces the wait time
- Allows you to scrape earlier
- Gives you flexibility to work throughout the year and in colder climates
- Prevents winter issues such as render cracking and lime bloom
- Keeps you on track with project deadlines
- Easy to use and doesn't affect the appearance or performance
Construction projects often have tight deadlines and therefore clock watching whilst your render slowly dries through winter isn't helpful. Using Render Accelerator means this wait time is reduced as the curing time is cut in half. Depending on the type on render you are using this can really speed up your project and keep you on track to meet deadlines. If you're looking for a textured render finish, accelerator can mean you'll be able to scrape much sooner. Scraping your render should be done when the render is set but not completely hardened. You should use your float in light circular motions to remove up to 2mm from the surface. Usually you would scrape the next day but with accelerator this can happen the same day.
Render Accelerator gives you the flexibility to render throughout the year without the worry of winter issues that affect the integrity of your materials. Slow curing can often lead to cracks which of course looks unsightly but also allows moisture to seep in and cause further damage. Slower water evaporation can also cause white discolouration known as lime bloom. Using render accelerator can prevent these issues.
-
From Concept to Creation: Building your Dream Render Spray Gun
1 December 2023Your Render Spray Gun is an essential piece of kit to sit alongside your electric or diesel rendering machine. You'll be working with your spray gun for long periods at a time so it should almost be an extension of your arm; comfortable, lightweight and easy to use. At CES we can adapt any spray gun to suit you or build a bespoke gun from scratch to make sure it suits you, your machine and the material you are using. In this blog, we'll explore the spray gun options at CES Hire and how to go about building your dream render spray gun.
What to Use if You're Starting Out
If this is your first render spray job, we would recommend purchasing a Basic Aluminium Render Spray Gun. This is your standard spray gun to apply basecoat or monocouche with an air shut-off that allows your gun to simply stop and go. When you come to the end of your spray application, turn off your air first before switching off the machine, then release any air to stop any pressure build up. You can fit any nozzle to this gun (10-16mm) depending on the material you're spraying and the finish you wish to achieve.
Extras for Your Spray Gun
The next step up from your basic render spray gun is adding a material shut-off. This prevents additional product oozing from the gun once you've finished spraying meaning less wastage. When using a material shut of, turn off your air, followed by the material shut-off and finally the machine itself. It must be switched off in this order; if you turn of the material valve first first, the air will continue to pump the product with nowhere for it to be released. This will cause enormous pressure build up and a chance of a blowing a hose which can be extremely dangerous.
Another addition could be a dual air control (also known as a bleed valve or air dump). This can allow you further control over your product and spray pattern by adjusting the air going into the product.
Adding a swivel coupling to your spray gun can make it easier to manoeuvre your spray gun and give you further flexibility when spraying.
Finally we can offer a Long Render Spray Gun which can be very useful when reaching areas than can be out of reach e.g. a gable end. The 717mm lance allows you to easily spray those tough to reach spots without the need for hop-ups. This can be very useful when working on scaffolding when a hop-up would compromise health and safety but you have corners and edges that are tricky to get to.
Nozzles
Our spray guns come as standard fitted with a rubber spray nozzle. These nozzles are simple to fit with their easy clip-on design and are made of hardwearing flexible rubber. They are available in 10-16mm sizes to work with different products or achieve various pray patterns. They can be used multiple times and are easy to clean.
An upgrade to these nozzles are the conical shaped spray nozzles. These are designed with a screw thread which makes then very secure. As with the rubber spray nozzles, they are available in 10-16mm but with the addition of the screw thread, you can twist in and out to achieve varying spray patterns. They are also easy to clean and can be used over an over again with their durable plastic design. For more about spray nozzles check out our blog >
-
Rotors & Stators Unveiled: The Dynamic Duo Powering Modern Machinery
1 December 2023When it comes to selecting the right rotor and stator for your machine, the options can be overwhelming. With so many choices available, it's important to match the correct rotor and stator to your pump, considering factors such as material and aggregate size, as well as speed and pumping pressure. If you're unsure which rotor and stator is right for you, don't hesitate to give us a call at 01494 715472. We're here to help. In the meantime, continue reading for more information on the world of rotors and stators.
How Does a Rotor & Stator Work?
The rotor and stator mechanism is the driving force behind many of our machines. Whether you're working with render, plaster, grout, or liquid flow screed, the product is directed through the rotor and stator by a cardan or mixing shaft. The spiralled steel shaft, known as the rotor, rotates inside the stator, which is the rubber-lined stationary component. This rotation creates conveying chambers that move in the direction of flow, allowing for a continuous flow that pushes the material through the hose and onto the surface. It's crucial to select the right rotor and stator, as they vary in terms of speed and pumping/spraying output. You can find a range of rotors and stators in our online shop.
Which Rotor and Stator is right for my Machine?
To determine which rotor and stator fits your machine, start by checking the product spec/data sheet. Generally, the size of the rotor and stator corresponds to the size of the machine. For example, larger rotors and stators like the 2L6+++ are designed for big diesel machines, capable of handling larger aggregate sizes and offering greater material output. On the other hand, smaller rotors and stators are compatible with smaller aggregate materials and achieve lower material output.
Why Do they Come in Different Sizes?
Rotors and stators come in different sizes and shapes for various reasons:
1. To cope with different materials
2. To pump at different pressures
3. To pump at varying speeds
4. To allow for more control
5. Personal preference when working
6. To handle larger jobs
Rotor and stator data sheets often specify a standard speed of 400RPM. Renderers generally have a preferred rotor and stator that allows them to work at their desired speed while maintaining control over the render's drying time and finishing process. Experienced renderers may even be able to work with faster rotors and stators while remaining in control. The intricacies of the job can also impact rotor and stator selection. For example, a block of flats with many windows may require more control than a large flat warehouse wall. When using render, it's important to consider the time it takes for the product to dry and whether you'll be scraping the same day or the following day. Liquid flow screed, on the other hand, is pumped at a much faster speed, as it sets within 30 minutes to an hour, requiring quick and uniform filling of the space.
Size is an important factor when it comes to rotor and stator selection. While larger rotors and stators generally fit larger machines, it's not just the length and width that matter. The pitch, or ridges, on the rotor also influence pumping speed and pressure. Rotors with more or deeper pitches pump at higher pressures. Greater pressure may be necessary when pumping over longer distances, through more hose, or when spraying at greater heights. Conversely, rotors with shallower pitches produce lower pressure, as the material slides through more easily with fewer ridges to navigate. The shore, or firmness, of the stator is another consideration. A higher number indicates a firmer inner tubing, and a softer stator is often recommended for coarser materials.
What if I Select the Wrong Rotor and Stator?
While some machines can accommodate multiple rotors and stators, allowing for versatility in handling different materials, it's crucial not to fit the wrong rotor and stator to your machine. Using the incorrect part can cause serious damage. Pumping a material with aggregate that is too large for the rotor and stator can potentially cause a blockage. Failing to address a blocked machine promptly and wash it out can lead to further problems and expensive repairs. Additionally, using the wrong rotor and stator with a different product can result in excessive wear on the moving parts. Larger aggregate pushing through a smaller rotor and stator causes significant wear, and since these parts are expensive to replace, it's best to avoid having to replace them after every job.
For more information on rotors and stators specifically for rendering pumps, check out our blog.
-
How to Use Render Mesh Like a Pro
1 December 2023Render mesh or mesh cloth is used for wall reinforcement plastering, rendering, roof waterproofing and external wall insulation. This innovative intricately woven fibreglass mesh is a key part of modern rendering; long gone are the days of using chicken wire or stainless steel mess. Embedding mesh in your render system will reinforce your render, help resist wear and tear, strengthen and prevent against cracking and generally ensure your render stands the test of time.
Render mesh is designed with strength and flexibility in mind, working in harmony with modern flexible and breathable renders. With changes in weather and temperature, external walls can expand and contract minutely however mesh enables your render system to flex and prevent cracking with these small movements. Render Mesh is also ideal for holding insulation boards together in EWI systems.
What to look for in your render mesh
When selecting your mesh look for a quality product with a pressed weave, if not the mesh can fall apart and can compromise the structural integrity of your render system. Also ensure the mesh is alkaline resistant, without this quality the chemicals in the render will break down the mesh and cause weakness in your finished render. You can purchase various weights depending on where the product is being used. Heavier meshes are ideal for more impact resistance such as sports walls/surfaces than can take a beating from balls or pounding feet. It will also given you peace of mind that render mesh is designed with fire resistant properties to give your property extra protection.
Where to Apply Render Mesh
Some contractors will fully mesh their render for additional reinforcement whilst others will apply at stress points and openings. Stress points include above and below openings such as windows and doors as well as at junctions of dissimilar materials and crack inducers like weep holes. Corners are also well known to be weaker areas however combining mesh with beads will ensure you achieve a strong finished result. As with any building material or product, always refer to the spec sheets provided to ensure the product is suitable for the render.
How to Apply Render Mesh
The positioning of mesh within your render is vital. It shouldn't have contact with the substrate and should avoid being exposed by the scraping process. The mesh should be placed within the first 5-10mm of the total render coat. You should press evenly into a freshly applied pass of basecoat using a trowel or spatula. It must be embedded in wet on wet process to achieve the necessary bond and should never be mechanically fixed. You should also always overlap the mesh (at least a 50mm overlap) to prevent gaps where cracks can occur.
Render Mesh at CES
Our Fibreglass Pink Rendering Mesh is a pink render mesh is made of a fibreglass material with a latex alkaline resistant coating. This coating prevents the chemicals present in cement, screed, plaster or renders from degrading the fibreglass retaining the meshes strength. our mesh gives a coverage of 50m² and is a weight of 160g/m². Our render mesh come in rolls of 1m x 50m and bulk buy discounts are available on purchase of 42 rolls or more.
-
Spray Rendering with Skill Builder
1 November 2023Back in June, CES were delighted to be invited to join EWI Pro and Skill Builder on site to support them with their video production and render project which featured our very own Euromair DropPro 8P. If you're new to spray render or considering it, it's well worth taking a look at Skill Builders video over on YouTube.
Though we were behind the scenes, CES joined EWI Pro's Paul Harris and Skill Builder's Roger Bisby as they took on a silicone render project. Paul has been spraying render for at least a decade so bought a wealth of experience to support first-time render sprayer Roger. Though Roger had trowel applied silicone render, this was something entirely new. Fortunately using the Euromair DropPro 8P is ideal for someone fresh to the process as it incredibly easy to use.
The video is packed with tips, tricks and reminders to get the most from your spray machine. Including pointers such as:
- Always mix your silicone render for at least 5 minutes with a power whisk/mixer
- Cleaning is an absolute priority with your render machines to keep them running at optimum level. One tip to make life easier, is to line the machine hopper with a polythene or plastic sheet
- Never scrape out your material tub as this is where a crust may have formed especially if left in the sun. This crust with then most likely block your spray gun
- Always watch the pressure gauge as this will indicate if you have a blockage. The pressure will usually operate around 2bar
- When operating the spray gun, turn the material shut off valve fully on/fully off
- Always begin and end spraying into a bucket, this avoids splat marks on your walls and ensures an even texture
- ALWAYS wear safety glasses as there will inevitably be some stones that will blow back as you apply
- Spray about 300mm from the wall in circular motions overlapping (Paul's tip: spray in the style of Olympic rings)
- Finally always spray past any reveals/beads to avoid a heavy build up on these edges.
Check out the YouTube video to see how Paul and Roger got on and the house transformation they achieved with the Euromair DopPro 8P. For further information on hiring this electric machine head to our website.
-
Construction Essentials: Picking The Perfect Sponge Balls For Your Hose System
1 November 2023Rubber Hose Sponge Cleaning Balls are a must-have when it comes to cleaning and maintenance of your plastering, rendering, grout, flow screed and cement pumps and machines. These handy sponge balls are simply used to flush your hoses clean after use to keep you machine and hoses working efficiently and in optimum condition.
Sponge balls are available in a range of sizes to cater to different hose dimensions. At CES, we offer sizes such as 30mm, 45mm, 60mm, 120mm (4 inch), and 150mm (5 inch). These popular cleaning balls are supplied in medium density, making them effective in removing cementitious products from rubber delivery hoses. This means your machines are clean and ready to go for future projects without any worry of residue or leftover material in your hoses which can compromise the product running through the hose.
How they work
These innovative sponge balls are designed to fit through hoses when compressed and expand upon contact with water or cleaning agents, ensuring a thorough and effective cleaning process. Made from a soft and absorbent material like polyurethane foam, these sponge balls effortlessly absorb water and soap to help loosen and remove dirt and grime. With their gentle scrubbing action, they effectively eliminate stubborn build-ups without causing any damage to your valuable hoses or pipes. The rubber hose sponge cleaning balls are not only versatile but also cost-effective, making them an essential tool to enhance the performance and durability of your hoses and machines.
How to use sponge balls
-Pump the remaining material out of the hose.
-Place the ball inside the hose.
-Remove the nozzle and the air tube from the spray gun.
-Push the ball into the hose and then connect back up to the pump to push water behind it, and wait until the ball comes out.
-Repeat sending the ball through the hose until it runs clean
Which Size is right for you?
- The 30mm cleaning ball is ideal for 25mm rendering whip hoses or delivery hoses on smaller electric machines like the MixPro 28 or PFT Ritmo. It ensures effective cleaning and prevents any blockages or build-up.
- If you're working with larger electric machines or diesel machines such as the MixPro 50, Compact Pro 80, or SP11 render set up, the 45mm cleaning ball is the perfect choice. It is designed to clean 35mm rendering delivery hoses, ensuring optimal performance.
- When it comes to screed and grout hoses measuring 50mm, the 60mm cleaning ball is the go-to option. It is compatible with popular machines like the Putzmeister SP11, Euromair CP80, and Flow Screed Pumps, providing efficient cleaning for these hoses.
- For traditional screed pumps with a 65mm hose, the 80mm cleaning ball is the recommended size. It effectively removes any residue or debris, ensuring the smooth operation of equipment such as the Putzmeister M760 and M740.
- When working with 4 inch concrete pumping hoses, the 120mm cleaning ball, known as the RoLine cleaning ball, is the ideal choice. It fits perfectly in hoses used with Putzmeister RoLine concrete pumps and similar models, guaranteeing thorough cleaning.
- Lastly, the 150mm cleaning ball is designed for 5 inch concrete pumping hoses, also known as line pumps. It ensures the cleanliness and optimal functioning of these hoses, providing peace of mind for contractors.
With our range of Rubber Hose Sponge Cleaning Balls, contractors can confidently maintain the cleanliness and efficiency of their equipment. Whether you're using smaller electric machines or larger diesel machines, we have the right size cleaning ball to suit your needs. Trust in the quality and effectiveness of our products to keep your hoses in top condition.
-
Making A Splash: How Render & Screed can be used for pools
10 October 2023When it comes to building or renovating homes, render and screed are often at the forefront of people's minds. However, it is important to recognise that both render and screed are also crucial elements in the construction of swimming pools. Rendering a pool is a completely different process than rendering walls due to the added pressure from water on the surfaces and finishes. This means that careful consideration must be given to the materials and application methods used. Here are some tips to help you with the rendering and screeding of your pool.
Once the initial concrete pool shell has been sprayed or shuttered into place, the next step is to apply render and screed before adding the final decorative finish of tiles, mosaic, or terrazzo. The pool walls can be rendered, while the floor can be rendered, self-levelled, or screeded. This stage is crucial as it creates an even and smooth surface that is essential for achieving the desired final finish. Given the unique requirements of pool construction, it is recommended to use a specialist polymer enhanced screed/render. Alternatively, a pre-mixed waterproofing solution can be combined with render to ensure optimal results.
When applying render to opposite sides of the pool, it is important to ensure that they are parallel and plumb. This requires careful preparation when installing the render system to ensure that all surfaces are completely flat. Any unevenness can be visible, especially when underwater lights are turned on. Some tradesmen have found that placing a run of battens along the top and bottom edge of the pool is helpful in achieving a perfectly smooth and flat render. These battens allow the applicator to easily run a rule/derby/I-bar across the render, resulting in a flawless finish. Once the render has completely cured, the battens can be removed and any gaps can be filled to match the level of the cured render.In recent years, liquid flow screed has gained popularity as an alternative to traditional sand and cement. This pre-mixed screed is quick to pour and dries faster, making it a convenient choice for pool construction. Screeding the pool floor is an excellent way to create a level base for the final finish. Depending on the specific product you are using, the screed can be laid at depths as little as 25mm. However, it is important to always refer to the product specifications to ensure that you avoid any potential cracking issues.
In conclusion, render and screed are essential components in both home construction and pool building. Understanding the differences and requirements for rendering and screeding pools is crucial for achieving a successful and visually appealing final result. By carefully selecting the appropriate materials and applying them with precision, you can ensure that your pool is not only functional but also aesthetically pleasing. So, whether you are building a new pool or renovating an existing one, make sure to keep these tips in mind for a successful rendering and screeding process.
Additionally, it is worth mentioning that proper maintenance is crucial to ensure the longevity and durability of your pool's render and screed. Regular inspections and repairs, if necessary, should be carried out to address any cracks, chips, or other signs of wear and tear. It is also important to use the correct cleaning and maintenance products to avoid damaging the render or screed surface. By taking these steps, you can enjoy a beautiful and well-maintained pool for years to come.
-
The Ultimate Guide To Pressure Grouting: Techniques, Benefits And Best Practices
28 September 2023With fast-paced living and tight deadlines, the construction industry can be under pressure to complete projects quickly. Sometimes this can lead building work taking place on unstable ground and such issues being overlooked or ignored in the rush to meet a deadline. This can lead to many more problems further down the line. This is where pressure grouting can really save the day and can stabilise, strengthen and reduce permeability of the ground.
Find Out MoreWhat causes ground instability?
- Sometimes the ground composition is just naturally made up of softer materials or material prone to stability issues.
- Rain and weathering can impact ground stability even creating sinkholes which occur when rain seeps down and loosens the earth
- Human activity such as abandoned mines can also have an effect on the ground
- Errors in construction from civil engineers and foundation contractors
Pressure Grouting Techniques
Pressure grouting (also known as permeation or injection grouting) is a great solution for poor ground stability. This foundation repair technique pumps a cement mixture into the ground. However there is not a single way to carry out this process since it is condition dependent considering the ground composition and whether you are working beneath an existing structure or an empty development space.
Pipes are injected to the lowest elevation into the earth down to the bedrock. The depths the pipes are pushed down will vary depending on the size of the structure/project and the nature of the soil. The cement is then injected under pressure at planned locations through single or multiple port pipes. The pressure will vary from project to project and should be monitored carefully.
As the cement is pumped through the pipes you should watch the pressure gauge between the pump and pipes as well as observe any movement in pre-existing buildings or structures. Once the pressure reaches it's max, the grout pipe is then lifted in five foot increments until about 10 feet from the surface.
The Benefits of Pressure Grouting
Pressure grouting offers a multitude of benefits when it comes to stabilizing groundworks and foundations. Firstly, it causes minimal disruption to the surrounding landscape, nearby structures, and the soil. Unlike alternatives such as concrete piling or the laborious process of removing and replacing concrete, pressure grouting is a much more cost-effective solution. It can even be carried out in areas where access is difficult or space is limited, making it a versatile choice for various construction projects.
One of the key advantages of pressure grouting is its compatibility with different materials and delicate installations. It can be applied next to existing foundations or adjacent to walls, providing strength and support without interrupting facility operations. Furthermore, pressure grouting is a vibration-free process, minimizing the risk of structural damage.
Another noteworthy feature of pressure grouting is its ability to expand and maximize the area of support and ground stabilization. Unlike piled solutions that have a smaller support area, pressure grouting ensures comprehensive and reliable reinforcement. It is also a fast-setting and easy-to-apply technique, making it a convenient option for repairing the foundations of old constructions.
However, caution must be exercised while using pressure grouting to prevent over-pressurization, which can lead to severe damage. To mitigate this risk, it is advisable to fit a pressure gauge to the machine or opt for a more controlled hand-pump approach.
In summary, pressure grouting offers an excellent solution for stabilizing groundworks, reinforcing foundations, and strengthening weakened structures like bridges, walls, and tunnels. Its cost-effectiveness, minimal disruption, versatility, and reliable support make it an invaluable tool in the construction industry.
-
Polythene Selection: Choosing The Optimal Materials For Your Project
22 September 2023Polythene is a popular construction material due to it's versatility and ideal properties for protection. However, with a wide variety of options available in the market, it can be confusing when determining which type of polythene will best suit your specific needs. If microns have you in a muddle and guages have you disengaged, we'll take you through all you need to know so you can make an informed choice that will ensure your project's efficiency and durability.
The Benefits of Polythene
Polythene is an incredibly useful construction material with many benefits including,
- durability
- water resistance
- flexibility
- affordability
- light-weight design
- insulating properties
- protective qualities
- versatility.
Understanding Microns/Guage
The quality of your polythene of course will depend on the microns/guage you select. Microns and guage is simply the unit of measurement for the thickness of the plastic. Guage is the tradition imperial measurement whilst microns is the more modern metric reference. You can work out the microns by dividing the guage by 4. The higher the microns/guage the thicker and more robust your polythene will be. Thinner polyethene (between 8-30 microns) will often be a one use cover to be discarded after use. Using this for certain projects can be risky as it may tear and subsequently allow moisture or debris into unwanted spaces. Thicker polythene ( between 125-300 microns) is extra-strong and tear-resistant. It will cope with more wear and tear and can be used for much longer periods of time or in more challenging conditions. The thicker the polythene the more expensive it will generally become however you will find it lasts a lot longer and can be used multiple times if you are careful when removing and storing.
Uses of Polyethene
Protective Sheeting-With waterproof, flexible and light-weight properties, polythene is ideal for protection within your project. Whether you are painting or plastering, renovating or rendering, polythene will contain unwanted dust and debris as well as stop it spreading. Since it can be cut to size and is flexible it is perfect for protecting immovable furniture and keeping tools, equipment and materials clean and dry (read our earlier blog on storing/protecting your render effectively).
Moisture Prevention- Polythene can be used between layers of insulation to prevent moisture passing through. Damp Proof Membrane (DPM) which is 250microns or more protects the structure from damp and potential mould. DPM will prevent damp penetrating walls, ceiling and floors and are crucial in wet area such as kitchens and bathrooms. It can also act as a waterproof membrane on a roof to prevent leakage.
Weather-Proofing-Polythene will cover openings and exposed areas when projects are taking place in bad weather or are needing a temporary seal. It can act as a temporary roof for up to 6 months protecting the property as well as workers and equipment. If there are delays in installing windows, doors or skylights, polythene can be used as a temporary seal from light winds and rain.
Protecting Concrete during curing- When concrete is poured, it should always be covered until it has cured. Temperature and moisture affects the curing process since it will crack if it cures too quickly. Whilst cracks look rather unsightly, more importantly they can compromise the structural integrity of the building. A layer of polythene acts as a moisture-proof insulator, allowing a more controlled cure. The colour pf your polythene can be important in this case. Light colours reflect the sun so should be used in hot/dry conditions. Dark colours absorb the heat and therefore are better in lower temperatures.
Packaging- Within Construction, parts and materials can often be bulky and packaging solutions can be a little trickier. Polythene is an effective solution to create a protective shipping covering.
Polythene at CES
We offer polythene in three different weights to cover all your construction needs. The TPS clear polythene sheeting is our thinnest option offering a light protection at just 30microns. We then supply a 125microns heavy duty polythene which is more durable for longer/more challenging projects. Finally our 300 micron Damp Proof Membrane is the most robust of our polythene and offers a barrier to moisture entering a property.
-
The Purpose of Plastering
22 September 2023Plastering is a craft that has been around for centuries and is a staple part of much construction work. Whilst plastering is perhaps not given much though given that often more time is put into the decorative finish placed over the plaster, it is still a crucial part of the building process. There are a huge number of benefits to plastering and whether you're hand or machine applying we explore the purpose of plastering here.
-
Surface Preparation: Plastering helps to create a smooth and level surface on walls and ceilings, covering any imperfections or irregularities in the underlying construction materials. This smooth surface serves as a base for further finishing work like painting, wallpapering, or applying decorative finishes.
-
Protection and Durability: Plastering adds a protective layer to walls and ceilings, shielding them from environmental factors like moisture, weathering, and minor impacts. This protection contributes to the longevity and durability of the building.
-
Aesthetic Enhancement: Plastering allows for a wide range of decorative finishes, textures, and designs, enhancing the overall appearance of the interior and exterior of a building. Different types of plaster finishes can be used to achieve various architectural styles and visual effects.
-
Fire Resistance: Some types of plaster, like gypsum-based plaster, provide fire resistance, helping to slow down the spread of flames and smoke in case of a fire.
-
Sound Insulation: Plastering can improve sound insulation properties, reducing noise transmission between rooms or from outside to inside.
-
Thermal Insulation: Plaster can also contribute to thermal insulation, helping to regulate indoor temperatures and reduce energy consumption for heating and cooling.
-
Repair and Restoration: Plastering is crucial for repairing damaged walls or ceilings, restoring them to their original condition or adapting them to modern requirements.
-
Hygiene and Cleanliness: Smooth plastered surfaces are easier to clean and maintain, making them more suitable for areas that require high levels of hygiene, such as kitchens and bathrooms.
-
Waterproofing: Plaster can be mixed with waterproofing agents to create a water-resistant surface, preventing water penetration into the building and protecting it from water damage.
Overall, plastering plays a vital role in the construction industry, providing both functional and aesthetic benefits to buildings, and contributing to their overall strength, appearance, and performance.
-
-
Tape It Up: The Fun And Functional Reasons To Use Painting And Decorating Tape In Your Next DIY Project
22 September 2023Are you ready to take your DIY projects to the next level? Look no further than painting and decorating tape to add a touch of creativity and precision to your work. Not only is it a practical tool, but it also can create fun and unique designs that will make your project stand out.
One of the key advantages of using painting and decorating tape is its ability to create straight, crisp lines. Whether you're painting a room or adding intricate designs to a piece of furniture, this tape ensures that your edges are clean, bleed-free and professional-looking. No more worrying about uneven lines or messy edges – with tape, your project will look like it was done by a pro. Even with the steadiest of hands, you won't be able to match the quality lines created by painting tape.
But it's not just about aesthetics; tape also provides practical benefits. When working on a large project, it can be challenging to keep track of measurements and maintain symmetry. Painting and decorating tape becomes your best friend in such situations, acting as a guide to help you achieve accuracy and consistency. With clearly defined lines, you can easily measure and mark the areas you want to paint or decorate, ensuring a flawless end result.
Painters tape will act as great protection over the areas to wish to keep paint free. If you choose to use a paint spray machine, whilst the tips spray with accuracy, there is often a chance of overspray so tape and other protection films are beneficial. No one wants a paint splattered ceiling/windows/carpet and also the time it consequently takes to clean up or touch up. Tapes are idea around trims such as baseboards/skirting boards/coving/cornices. Even if these areas are white and you're applying white paint, it's still worth masking up as the paint can still be visible especially when using different paints such as emulsion, gloss or satin paint.
What sets painting and decorating tape apart from regular masking tape is its ability to be easily removed without leaving any residue. This means you can experiment with different designs and patterns without worrying about damaging your surfaces. Plus, if you make a mistake or change your mind about a design, you can simply remove the tape and start again – no harm done. The option of more sensitive tapes available means that you can apply over fresh paint when creating new designs.
Another great reason to use painting and decorating tape is its versatility. It can be used on various surfaces, including walls, furniture, and even glass. This opens up a world of possibilities for your DIY projects. You can create complex geometric patterns on a feature wall, add a pop of colour to your furniture, go daring with a contrasting colour ceiling or even create stunning stained glass effects on your windows. The options are endless, and painting and decorating tape is the key to unlocking your creativity.
So, the next time you embark on a DIY project, don't forget to tape it up. With its ability to create clean lines, provide precision, offer versatility, and allow for easy removal, painting and decorating tape is an essential tool for any DIY enthusiast. Get ready to elevate your projects to new heights with this simple yet powerful tool.
-
From Rough To Smooth: An Adventure In Finding The Top Plastering Tools
22 September 2023
At CES we understand the importance of having the right tools to achieve flawless results. Whether you are a seasoned professional or a DIY enthusiast, the quality of your tools can make all the difference in transforming a rough surface into a smooth masterpiece. So how do you go about finding your top plastering tools?Plastering Preferences
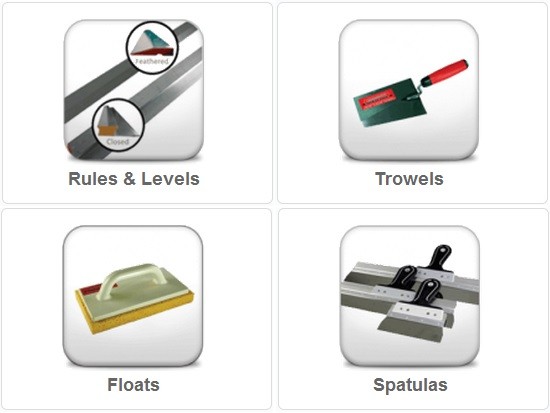
There is such a wide array of tool options available in the market, it can seem somewhat overwhelming for the beginner and what is deemed a top tool for one tradesperson may not be such a hit with another. From trowels and floats to hawks and spatulas each tool has its own unique features and benefits (find our more about the uses for each of these tools here >). Whilst some tools have a specific role and are essential to use as part of the plastering process other tools can be more of a preference. Finding your preference for finishing your plaster, takes time and experience. Whilst some plasterer's will always stick with smoothing and flattening with a finishing trowel others prefer to do this using a spatula. Try different tools and see what works for you.
Tool Quality
When searching for the top tools, you'll soon realise the importance of investing in high-quality plastering tools. While it can be tempting to opt for cheaper alternatives, they often lack the durability and precision required for professional results. Look for brands such as Marshalltown, Refina or Ox who are well known for quality tools and have a heap of expertise and experience behind every tool design.
Tool Design
Whilst a brand name can be important, the functionality and ergonomic design is most important when you're using these tools on a daily basis . Tools that offer a comfortable grip and ease of use proved to be invaluable during long hours of plastering. Additionally, features such as adjustable angles and interchangeable blades allow for greater versatility and precision in different plastering tasks.
Innovation
Just as plastering machines, are designed to alleviate stress and strain on the body from manual plastering, there are also innovative tools coming to market that revolutionise plaster finishing and reduce the manual elements. Tools such as the Eibenstock plaster and render power sponge float. This is an incredibly handy tool for the professional plasterer and renderer. The handheld rotary power float and sponge makes quick and light work of finishing your monocouche or plaster. This clever tool will float up to 50m² per hour and has a variety of disc attachments that can be used interchangeably depending on your project and finish.
Customer Recommendations
Customer reviews and recommendations are crucial in the quest for the top tool. Hearing first-hand experiences from fellow plasterers provides valuable insights into the performance and durability of various tools. This allows you to make more informed decisions and avoid potential pitfalls along the way. Social media can be a great way to see tools in action as well as contact fellow plasterer's for their opinions. There are also plenty of online forums or Facebook groups in which you'll usually get completely honest feedback for any questions you may ask.
So next time you're looking to upgrade your plastering kit do your research and pay close attention to tool quality, design, recommendations and innovative features. Armed with these tips, any plastering project can be approached with confidence and the assurance of achieving professional-grade results.
-
How to wear in your Plastering Trowel?
22 September 2023
Are you a newbie in the world of plastering? Wondering how to properly wear in your plastering trowel to achieve the best results? Look no further! In this blog post, we will guide you through the process of breaking in your plastering trowel like a pro.
Rendering Tools For Sale
Why should you wear in your trowel?First and foremost, it's crucial to understand that wearing in a plastering trowel is essential to ensure optimal performance and the very best finish. When you initially purchase a new trowel, it may feel stiff and unyielding with imperfections and sharp unforgiving edges. If you attempt to plaster with a trowel fresh out of the box, you will almost certainly encounter resistance from the tool as well as those sharp edges leaving lines in your finished surface. However, with the right techniques, you can transform it into a reliable tool that glides effortlessly across the surface, delivering flawless results. It's important to note that the wearing-in process takes time and patience. Don't rush it! Dedicate a few hours to work with your trowel on different surfaces, experimenting with different angles and techniques. Over time, you will notice a significant improvement in the trowel's performance and your overall plastering skills.
Breaking it in naturally
Many plasterers will hold on to a trusty trowel for years and years so it's worth investing in a quality tool. Over time, the tool simply becomes an extension of your arm working with you and adapting your preferences and techniques. Since a trowel is equipped with a metal blade, this will bend and shape with frequent use becoming more responsive. Many plasterers will claim the best way to wear in a trowel is by using it. We recommend using it either for render/sand and cement or on backing coats rather than your final finishing coat that way you can afford those sharp edges that may cut into the material.
Speeding up the wear-process
While you can purchase pre-worn trowels, don't be deceived, even these require some additional work to break them in to the standard to be used to finish your plaster. To accelerate the process of wearing in your trowel you'll need to work on the corners and edges using fine sandpaper a file or on a smooth concrete floor. Start by rounding off the harsh corners using a back and forth rocking motion. Try and complete this sanding process using smooth movements without excessive force which could damage the tool . Once all four corners are slightly rounded, gently smooth and round off all four edges. For a graduated rounding, start by sanding flat along the edges, then move to a 45 degree angle and finally a 90 angle along the thin edge. Use long continuous motions and be aware that this potentially isn't a one-off job as breaking in needs time and repetition for the best results and a flawless finish.
In conclusion, wearing in your plastering trowel is a crucial step to achieve top-notch results. Follow the steps outlined in this blog post, and with practice, you'll master the art of breaking in your trowel. So, what are you waiting for? Gear up and get ready to elevate your plastering game to new heights!
-
CES Hire: An Exciting New Chapter
22 September 2023
This year at CES Hire we have been celebrating an amazing 40 years in business. This feels a somewhat poignant moment to announce some exciting changes within the company.
Make An Enquiry
Nick, our esteemed company director, will be taking a step back from his current role after an incredible three decades of leadership. However, Nick's journey with CES is far from over. He will be transitioning into the role of CES chairman, where he will continue to provide invaluable guidance and expertise. Nick's wealth of industry experience and his unwavering commitment to the company make him the perfect fit for this new position. This move and step towards retirement will provide Nick with more flexibility in his schedule, allowing him to pursue his passions and interests outside of the office. He will have the opportunity to dedicate more time to the activities he loves."I would like to take this opportunity to wish Ben all the best in taking on the new role as Managing Director. I have faith in him and the team at CES to take the company forward into the future. Personally, I am looking forward to spending more time pursuing my interest in cycling, gardening, learning to sail, seeing more of the world and watching my granddaughters grow up."
Simultaneously, Ben will be stepping up to the position of company director after, believe it or not, ten years of working for CES as of next month. This promotion is well-deserved and reflects Ben's contribution to our team over the years. Back in 2013, Ben began his journey with CES fresh from college where he had studied at The Peter Jones Enterprise Academy (a course delivered by Amersham College). His journey within the business began in a sales and marketing capacity and has evolved as the company has grown leading to Ben taking on the role of General Manager in January 2022. On speaking to Ben about his development within CES he said;
From a personal perspective it's been fantastic to have been given the opportunity to grow and progress with CES. I also want to express my thanks to Nick for his continuous support in my growth and the trust he has placed in me. I'm excited to see where we can take the company within the next decade leading up to it's 50th year and beyond."
With Ben's extensive knowledge and experience within the company, we have no doubt that he will continue to drive CES forward into a new chapter.
These changes mark an exciting new phase for CES Hire. We are confident that under Ben's leadership and with Nick's continued involvement, CES will continue to thrive and exceed expectations in the industry. We extend our heartfelt congratulations to both Ben and Nick for their remarkable achievements and look forward to a bright future for CES Hire. Stay tuned for more updates on our journey!
-
Bring Your Designs To Life: An Exciting Exploration Of Cutting-Edge Rendering Tools
22 September 2023Perfectly finished render is truly a sight to behold. It not only enhances the aesthetic appeal of a home but also adds value and durability to the structure. Rendered homes are currently experiencing a surge in popularity, and it's easy to see why. Whether it's a modern extension or a classic, traditional house undergoing a facelift, rendered surfaces have become a popular choice among homeowners.
The beauty of render lies in its versatility. It can completely transform the appearance of a house, giving it a fresh and contemporary look. With a wide range of colours and finishes available, homeowners can choose a render that complements their personal style and enhances the overall architectural design. So what are those cutting-edge tools to invest in which will help you achieve a stunning render finish to impress your customer? Read on as we explore the top tools in our CES Render Toolkit.
Scratch-Up with a Scarifier
After applying the initial scratch coat/basecoat, it's important to create a textured surface. A scarifier is a top choice for this part of the process. By scratching the base coat, you create depressions that provide a secure grip for the finish coat. It's important to be mindful of the render drying completely, as it would make it impossible to achieve a decent key. A scarifier will easy sweep through the basecoat with the prongs creating the required indentations.
Flatten out with a Serrated Rule or Toothed Spatula
Once you have carefully prepared the base coat, it's time to move on to the exciting part - applying the top coat. This second layer should be thicker than the first but always refer to the data sheet provided by the material manufacturer for specific product depth recommendations. Once you're satisfied with the top coat, it's time to bring out the Serrated Rule or Serrated/Toothed Spatula. These tools are used whilst the render is still wet and will flatten out the rough sprayed-application texture. By scraping off any excess render with its straight metal edge, the Rule ensures a flawless, professional-looking surface. The toothed edge will also remove air pockets within the material to all in all help create a perfectly even wall. Just like with the scratch coat, it's important to apply the right amount of pressure, avoiding the temptation to over-work the render.
Remember, timing is everything. It's crucial to use the Rule while the render is still wet, starting from the bottom and working your way up. This technique allows you to scrape away any high spots, leaving you with a flat and even wall. If you happen to notice any low spots or missed areas, simply apply some additional render and repeat the ruling process until you achieve the desired result.
Smooth Down with a Spatula
Having flattened out your initial render spray, next it's time to smooth the surface before leaving it to cure. The Spatula is an essential addition to your collection of rendering tools; it is the perfect tool for achieving smooth and flawless finishes on plasters and renders, especially when working with thin coat render systems. With its flexible and thin stainless steel blade, the Spatula becomes your secret weapon for creating the smoothest surfaces. As you glide the fine blade over the material, it effortlessly fills in any hollows, resulting in an impeccably even finish.
Scrape Back with an I-Bar
Having waited for your render to go green (sufficiently dried out but still workable), it's time to embrace the art of scraping. Introducing the I-bar/I-Rule, a incredibly useful tool that is aptly named due to its 'I' shape. This ruler-like implement covers a substantial area of the wall, allowing you to effortlessly scrape and achieve a flawlessly flat finish. With your body as the driving force, glide the I-bar over the render, skilfully removing that pesky top layer of laitance. For those unfamiliar, laitance is the delicate, milky, or powdery residue comprised of cement dust, lime, and sand fines that tends to mar the surface of concrete.
Scratch Up with a Scratcher
Now it's time to bring out the somewhat daring-looking tool known as the scratcher or scratch float. This unique float is equipped with a bed of sharp nails, allowing you to effortlessly and evenly scratch back your render. With a render thickness of around 18mm, you'll be removing 2-3mm to achieve a flawless 15/16mm finish. The scratcher should be skillfully operated in gentle circular movements, ensuring the creation of a surface that is nothing short of perfection. It's highly recommended to have a brand new, sharp scratcher in your toolkit, just in case you encounter an overnight set that unexpectedly cures more quickly.
Achieving a flawless finish requires attention to detail, especially when it comes to scraping. Missed marks can be glaringly obvious, leaving behind a slightly lighter patch of colour. To spot these imperfections more easily, consider using tinted safety specs. Consistency is key in the process of rendering, and this applies to scraping as well. It's important to scrape all surfaces at the same time point throughout your project. Scrape too early, and you'll achieve a deeper texture and darker colour. Scrape too late, and you'll notice a lighter shade. Timing is crucial, especially when it comes to adjacent walls that can end up looking like contrasting colours. Lastly, don't forget to brush down the surface to remove any loose aggregate. Brush horizontally and vertically for a polished, clean finish.
Finish off with an Ashlar Cutter
Whilst some customers require an ultra-modern blank canvas of render, others prefer a more decorative look for their render. This is where the Ashlar Cutter comes into play. With its toothed design, this tool allows you to create intricate patterns and profiles in the top coat of render, adding character and architectural flair to modern buildings. When using the Ashlar Cutter, it's important to ensure that the render is still in its green state, not completely hardened. To begin, mark out your desired cuts using chalk and place tomber battens along these lines. Carefully cut along the chalk line to the correct depth, ensuring that the render is at least 15mm deep at its lowest point. Immediately after cutting, use a soft bristle brush to remove any debris, leaving behind a pristine finish.
Rub Up with a Float or Finishing Trowel
For those who prefer a more refined and polished look, there's a special tool that can help you achieve just that - the sponge float. This must-have item deserves a spot on our cutting-edge rendering tools. Before using it, make sure to dampen the sponge, but be careful not to make it too wet as it may cause the render to foam. The technique is similar to using a plastic float, as you'll rub the tool against the render in gentle circular motions. Remember, a light touch will result in a smoother finish. By finishing off with a sponge, you can create a stunning texture on your wall that will leave a lasting impression.
We also recommend a Plastic Thin Coat Texturing Finishing Trowel to achieve a flawless and polished finish on your render. This popular tool is specifically designed to rub up top coat/silicone renders, leaving you with the perfect result. To use, work the blade in circular motions ensuring you always move in the same direction to achieve a consistent finish. Work from the top down taking care not to rub too aggressively.
There you have it, a run down of our top recommendations for rendering tools. Our YouTube channel is a great place to explore to see some of our tools in action. Check out this video below which takes you through the process of spraying KRend Monocouche and the tools involved in finishing the surfaces to highest quality.
-
The Science Of Screeding: An In-Depth Look At The Top Liquid Screed Machines
22 September 2023Liquid screed machines have revolutionised the flooring industry, providing a seamless and efficient way to achieve level and smooth surfaces (find out more about the benefits of a screed pump here>). With a wide range of options available, it can be overwhelming to choose the right liquid screed machine for your specific requirements. In this in-depth look, we will explore the top liquid screed machines offered at CES and help you make an informed decision.
At CES we offer a selection of liquid flow screed or latex screed pumps to cope with the variations of different materials, project sizes and site restrictions. Of the five machines below, the first two are electric versions that will be used for bagged products. The final three machines are diesel pumps which offer a larger output and are compatible with liquid flow screed provided by a ready-mix truck.
1. Euromair MixPro 28- Our smallest electric machine for flow screed is the Euromair MixPro 28 and can even be transported by one person. This 240volt machine is a continuous mixer pump designed with a 70litre hopper capacity for your bagged machine-apply able floor screed. It has a built in water meter with digital display to easily control your product to water ratio. When fitted with a Mixer 26 Rotor and Stator, the MixPro 28 will pump up to 16litres per minute. However, you can also fit a Mixer 32 rotor and stator to enable a maximum pumping output of 30litres per minute.
2. Euromair MixPro 50: This is the second in our offering of electric screed pumps compatible with bagged latex screeds for example Sika Latex self-levelling or MaiPei Ultraplan amongst others. This is also a continuous mixer pump and similarly comes with built in water pump and flow meter. The difference with this pump is it's Three-Phase with a bigger hopper capacity of 150litres. Whilst there is no variable output, you can switch the rotor and stator to achieve different pumping speeds. When fitted with a D6-3 rotor and stator, you can pump up to 22litres per minute where as the D8-2 fitting will help you achieve a higher output of up to 32litres per minute.
3. Euromair X-Pro D80: This is the smallest of our diesel machines and is more of a multitasking machine since it's primarily a rendering machine. However with a conversion kit (including adaption tie bars, outlet and a MAP 9 rotor and stator), this machine will also pump liquid flow screed. The D80 is designed with a four cylinder Kohler engine and a 200litre capacity hopper. This powerful unit has an adjustable flow rate but can efficiently pump up to 60litres per minute.
4. Euromair X-Pro D140: Moving on to the second of our diesel offering and the smaller of our two flow screed specific machines. The Euromair X-Pro D140 can guarantee a continuous product flow coping easily with the metallic or synthetic fibres in liquid screed. Similar to the D80, this machine also has a four cylinder Kohler engine but boasts a higher output. This powerful machine pumps calcium sulphate self-levelling (anhydrite) and cement self-levelling at a maximum rate of 200litres per minute (14m³ per hour). It is fitted with a 60R12 rotor and stator enabling it pump up to 120m flat distance and a maximum aggregate of 8mm. One of the many advantages of the D140 is just how easy it is to maintain and service with accessible simple components.
5. Euromair X-Pro D200: The final of our trio of diesel flow screed pumps comes in the shape of the Euromair X-Pro D200, the bigger brother to the D140. This machine is equipped with a 36KW powerful 4 cylinder Kohler engine to cope with demanding large construction site work. Features are supersized on this machine, with a fuel tank capacity of 41.5litres and a hopper capacity of 190litres. All in all, the D200's powerful capabilities enable a higher output of up to 25m³ per hour.
When selecting the right liquid screed machine, it is crucial to consider factors such as project size, budget, and specific requirements. Each of the top machines mentioned above offers unique features and benefits, catering to different needs. By understanding the capabilities and limitations of each machine, you can make an informed decision that aligns perfectly with your flooring project.
In conclusion, liquid screed machines have transformed the way flooring is done, providing efficiency, precision, and superior results. With the top liquid screed machines mentioned above, you can achieve a seamless and level surface effortlessly. Check out some of our other blogs to delve into our top tips for preparing to pump flow screed as well as the most useful flow screed tools. Invest in the right machine, and witness the difference it makes in your flooring endeavours.