


Guide to Loft Ladder Installation
1 December 2022Purchasing a loft ladder is the first step in gaining access to valuable loft space for storage. The next step is installing it.
We have put together this introductory guide to help get you started. Please understand that each of the different types of loft ladders available from Ramsay Ladders is somewhat unique. As such, each ladder will have its own distinct installation requirements. This guide is intended to help you understand the basic process of installing a loft ladder.
Here are the tools you will need:
- Tape measure
- Hammer and screwdriver
- Square
- Panel and tenon saws
- Utility knife
- Drill (corded or cordless)
Installation will also require pins, nails, and screws.
STEP #1: CREATE OR MODIFY THE HATCH
The first thing you will need to do is either create or modify the hatch for your new loft ladder. If you are replacing an existing ladder, you may find that the hatch is not the right size. In many cases, width isn't a problem; it is only length you'll have to worry about.
You can extend the length by removing the trimmers at one or both ends of the existing hatch, cutting away additional joist material, and reattaching the trimmers. You will have to extend the side trimmers if they exist. Replace them or insert additional wood. In the absence of side trimmers, you are looking at floor joists on either side. You don't need to do anything with them.
If you need to create a hatch where none previously existed, you must be careful not to cut any timbers that provide structural integrity, or you could potentially weaken the roof or loft floor. The DIY Doctor recommends consulting with a structural engineer or another qualified professional if you are at all unsure about locating a new hatch. Incidentally, the DIY Doctor offers detailed instructions – complete with diagrams – explaining how to enlarge an existing hatch.
STEP #2: INSTALL SUPPORT BATTENS
With your hatch ready to go, you'll need to install support battens next. The point here is to create a support system that will hold your loft ladder box frame in place while you affix it to the opening. These battens will have to support the entire weight of your loft ladder, so make sure they are firmly affixed with screws. You can see an example of this step, from the DIY Network, here.
Your battens will be installed along the bottom edge of the hatch opening so that when the latter frame is installed, it is flush with the ceiling. Some people choose to leave the battens in place once installation is complete. These can be removed if you prefer.
STEP #3: INSTALL NEW TRIMMERS
If you are installing new trimmers over the top of the existing ones, now is the time to do it. Measure and cut your trimmers as needed. Then affix them in position with nails. Remember that trimmers are mainly cosmetic in nature. Caution when cutting and nailing minimises the risk of damage.
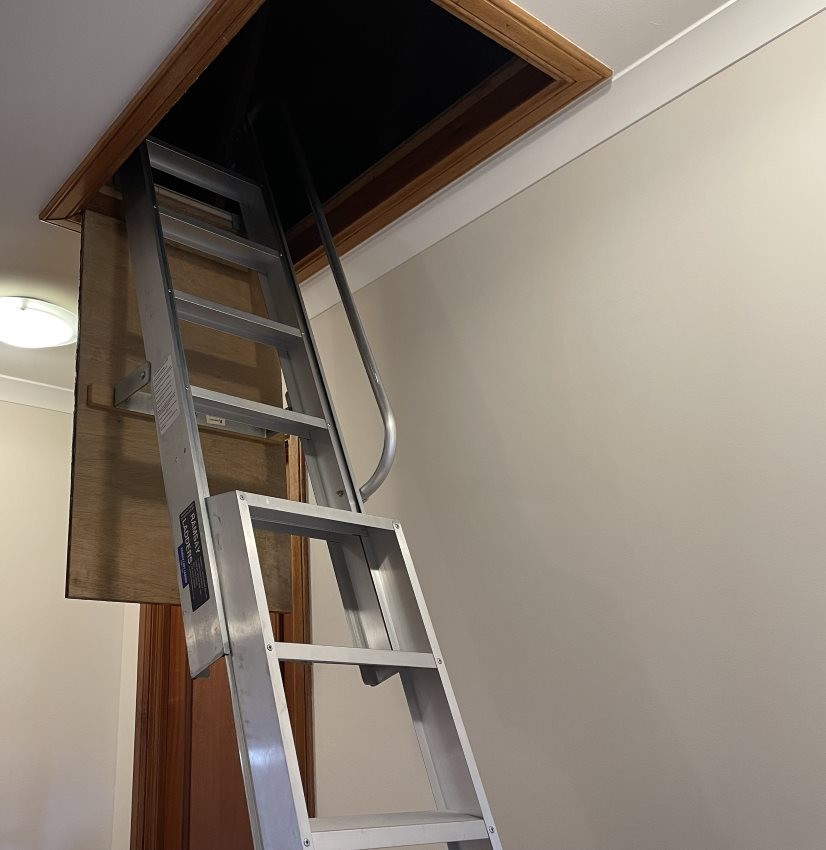
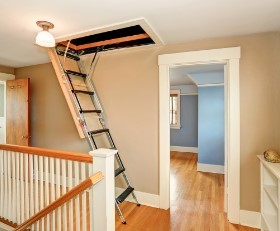
STEP #4: INSTALL THE LOFT LADDER
This next step is going to require assistance, so ask a friend or family member to help. One of you will be in the loft while the other is below the hatch opening. Assume you are the one in the loft, your partner will lift the loft ladder through the opening and hand it to you. You will rotate and set it on top of the previously installed battens.
From below, your partner should check to make sure the ladder frame is flush and square. You can move the assembly from up top as necessary. Once you are both satisfied with its position, it's time to drill holes at each end of the box frame. Then affix the frame to the hatch with screws.
Instructions that come with your loft ladder should explain where to locate the screws and the correct number to install. Note that you may have to attach one or two screws first, then extend the latter in order to gain access to the rest of the box frame.
SPECIAL NOTE: Before you drill holes and insert screws, make sure you have installed the loft ladder in the correct position. It is easy to place it in the hatch backwards. Doing so will require starting over.
STEP #5: FINISHING UP
With your loft ladder secured in place with screws, you are ready to finish up. Extend the ladder to make sure it fits properly. Depending on the ladder you chose (see our loft buying guide here) and the space you are working with, you may have to trim the legs. After that, installing optional trim around the hatch opening is all that remains.
Your ladder may have come with a trim plate built in, mitigating the need for extra trim on the ceiling. If not, you can still choose to not trim the opening. Adding the trim is purely aesthetic; it is not a structural requirement.
With moderate DIY skills and the help of a friend or family member, you can probably install your new loft ladder in just a couple of hours. Your two biggest concerns are cutting into floor joists and lifting your new ladder into place. Manage those two things correctly and all should be well.
Once again, bear in mind that this guide is intended to be general in nature. For more detailed instructions, speak to one of our representatives.