

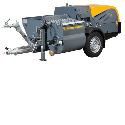


CES Hire Ltd
CES Hire are specialists in Spray Plastering Machines supplying a variety of machines for a range of different jobs. Our plastering machines can save you time as tests have shown that the time it takes to plaster one wall can be cut in half with a plastering machine. Our plastering machines can also save you money and a whole load of manual labour when on site.
-
Filling Your Space with Flow Screed: How much Screed do you need for your space?
27 July 2023Are you about to embark on a project that involves using liquid flow screed (also known as self-levelling or liquid screed)? If so, it's crucial to calculate the right amount of screed needed to ensure a successful outcome. In this blog post, we will guide you through the process of accurately determining the quantity of liquid flow screed required for your project. Remember this is just a general guide and for more specific support it is always worth contacting the product manufacturer. So, let's delve into the world of liquid flow screed to guarantee a smooth finish and efficient project.
Why is an accurate measurement important?
Flow screed has become incredibly popular due to easy and rapid application as well as much quicker drying times compared to traditional screed; all in all this saves on time and labour. Read more about the benefits of flow screed here > Whilst speedy drying is a great advantage, if you have miscalculated your screed volume and find you don't have enough to complete your job you'll be in a sticky situation. It would be unlikely that a ready mix truck could deliver additional flow screed before your original batch goes off or if you're used bagged material getting your hands on more quickly enough may also be a challenge. Mixing batches is never recommended as it will compromise the quality and structural integrity of the floor. Equally if you over-calculate particularly when it comes to ready-mix, you may be charged for the surplus which the product manufacturer may not be able to do anything with. So the moral of the story is, always measure carefully and double check your measurements or get a second opinion.
How to calculate your Flow Screed Volume
Flow screed comes either from a ready-mix truck when your working with larger volumes or can be purchased as bagged material when you're applying in smaller spaces. Whichever type of liquid screed you require, you'll still need to carefully calculate the amount of material you need. Follow these steps below to work out your flow screed volume.
- Measure the area in square metres. To do this measure the length and width and multiply these two values together.
- Decide on the thickness you require. Depths can vary between 25mm-50mm depending on requirements and whether you're installing underfloor heating. The depth you decide on will need to be converted into metres so it's the same unit as your calculated area.
- Calculate the volume by multiplying the area (step 1) by the thickness (step 2). The volume is then given in cubic metres.
- Make allowances for wastage or uneven application. Wastage allowance is often 5-10%. To calculate this amount multiply the total volume (step 3) by 1 + the wastage percent divided by 100
- Convert to litres for a ready mix truck or into bags for bagged material. For ready-mix flow screed , 1 cubic metre is equivalent to 1000 litres. Bags may come in 20kg or 25kg bags so it will depend on the product you select as to how many bags you need.
For example, this is how you would go about calculating the volume required for a room measuring 4m x 6m when you're installing 40mm depth of flow screed and allowing 7% of wastage.
- Area: 4 m x 6m =24 m²
- Thickness: 40mm (converts to 0.04m)
- Volume: 24m² x 0.04m =0.96m³
- Wastage allowance: 0.96m³ x (1 + 7/100) = 1.0272m³
- Conversion: 1.0272m³ = 1027.2 litres (round this to 1028 litres to accommodate the 0.2 litres). If you're working with bagged material, check the specific manufacturers guidance to convert your kg bags to the correct volume. Weber 4310 have a great conversion calculator that will calculate how many bags are required, take a look here >
Ready-Mix Flow Screed Installs
Large flow screed installs can often be more cost-effective. Greater volumes will mean using a ready-mix truck to supply your material. Generally there is a minimum order requirement when using flow screed from a ready mix truck though this will vary between companies. Minimum order quantities can typically be around 1 cubic metre (approximately 1000litres). The reason for minimum orders is due to the cost and logistics required for delivery including mixing and transporting with specialised equipment. It may be worth considering using a smaller electric flow screed pump and bagged material if your project doesn't fall within those minimum requirements.
-
Render Spray Nozzles-What's what?
20 July 2023What’s a Render Spray Nozzle?
Render spray nozzles are specialised attachments used for rendering or plastering. They are designed to be connected to a render spray gun to apply render or plaster materials onto wall, ceilings, or other surfaces. Their design allows for efficient and controlled spraying of the render mixture with a much faster application than traditional manual methods.
Rendering Tools For Sale
These nozzles are designed to produce a fine mist or spray of the render material, ensuring even coverage and a smooth finish. They can be adjustable, allowing for different spray patterns, textures, finishes and flow rates to meet the requirements of various applications. BY using these nozzles, contractors and professionals can save times and effort while achieving high-quality and uniform render finishes.
How to Achieve Different Spray Patterns
To achieve different spray patterns with a render spray gun nozzle, you can make use of adjustable nozzles or interchangeable tips available for various spray guns. Here's a general overview of how to achieve different spray patterns:
- Adjustable Nozzles: Some render spray gun nozzles have adjustable settings that allow you to change the spray pattern. The CES Mai Spray Nozzles can be adjusted simply by winding the thread up and down to vary the width of the spray pattern.
- Interchangeable Tips: Many render spray gun systems come with a set of interchangeable tips or inserts that can be easily swapped out to achieve different spray patterns. These tips have specific orifices designed to create different patterns.
How to change your spray nozzle
- Ensure the spray gun is turned off and the pressure is released.
- Unscrew the existing nozzle tip or use a wrench/tool to release clip-on designs
- Select the desired tip or insert from the set of interchangeable options.
- Screw or clip the new tip securely into place
- Adjust the pressure and flow rate settings on the spray gun according to the manufacturer's instructions.
- Test the spray pattern on a test surface or scrap material to ensure the desired pattern is achieved.
Note: The specific method for changing tips or adjusting nozzle settings may vary depending on the brand and model of the render spray gun. It's always best to consult the user manual or manufacturer's instructions for detailed guidance on your specific equipment.
Remember to wear appropriate personal protective equipment (PPE) such as goggles, gloves, and a mask when operating the render spray gun to ensure safety.
Spray Nozzles at CES Hire
At CES we offer three types of spray nozzle:
- Rubber Spray Nozzles
- Mai Spray Nozzles
- Fine Spray Gun Nozzles
The rubber spray nozzles fit the majority of render spray guns including Putzmeister, Mixer and PFT. They are available in 10mm, 12mm, 14mm, and 16mm and are attached by clipping onto the front of the gun. They fit snugly so may need a bit of force to attach however this reduces the amount of times that they blow off. The 10 and 12mm tips are designed to apply roughcast, 14mm tips are ideal to apply your standard monocouche and the 16mm tips are designed for sand, cement and lime applications.
The Mai Spray Nozzles are designed for the metal Mai Spray heads. These tips screw on by a thread so will sit firmly on your gun without risk of blowing off. You can adjust the spray pattern by winding the thread up and down. These plastic nozzles are supplied in 10mm, 12mm, 14mm and 16mm.
Finally the fine spray gun nozzles are designed for smaller applications and therefore come with smaller orifices. Generally they will spray thin coat and acoustic spray renders although they can spray 8/10mm basecoat. These tips are frequently used with smaller electric machines.
Are you plastering or rendering machines tired and worn out?
We have a wide range of products readily available to hire or buy.
-
Spray With Ease: An Exciting Expedition Into The World Of Airless Paint Spray Machines
13 July 2023If you've been a roller and brush decorator for many years, making the leap to a paint spray machine can be a daunting task. However with the right machine, support, technique and preparation you can achieve a flawless finish and reap the rewards of transitioning to the world of airless paint spray machines.
First Step: Always Prep
Preparation is essential in achieving a seamless as well as safe spray. Things to consider include:
- PPE
- Masking up and protecting your space from overspray
- Selecting the correct filter for your spray paint machine
- Choosing the correct spray tip
- Testing your spray pattern on a scrap piece of card before beginning
- Selecting the correct and compatible paint
- Read more on our helpful tips before using your spray paint machine here >
Science of Spray Tips
Selecting the correct spray tip is a science in itself and the more you use your machine, the more familiar you'll become with the number system. With the wide range of coatings available, it's important to select the appropriate spray tip for the job. Whether you're looking for precision work or rapid coverage, the spray tip regulates the paint flow and fan pattern. By controlling these factors, you can minimize paint wastage and project costs.
So, how do you work out the correct spray tip size? This involves reading the specification sheet of your paint to determine the recommended tip, considering the sprayer's maximum flow rate, and matching the tip size with the desired fan width. Remember, lighter coatings require smaller spray tips, while heavier coatings require larger ones. Tips will be marked with a 3 digit number. The first number (when multiplied by 2) indicates how wide the fan pattern is when sprayed from 12” from the surface. The second two numbers represent the orifice size in thousandths of an inch, essentially telling you how much paint will leave the gun. Check out our blog for further information and support with understanding tip size variations >
Our Top Tips on mastering the spraying Technique - 6 TIPS FOR THE BEST PAINT SPRAY TECHNIQUE
- Maintain a consistent distance from the surface
- Overlap each pass by 30% - 50%
- Keep the gun at 90° angle (dont spray at an angle)
- Trigger the gun before you begin each stroke
- Move at a consistent speed
- Flex your wrist
When it comes to choosing the spray pattern, remember to go vertical when spraying from side to side and horizontal when spraying up and down. Maintaining a consistent distance from the surface is crucial to avoid runs and overspray. Aim to stay within 10-25cm away from the surface for optimal results. Another key tip is to use long continuous passes, keeping the spray gun at a 90-degree angle from the wall or surface. Avoid spraying at an angle or swinging the gun, as this can lead to an uneven finish. Remember to flex your wrist while moving at a consistent speed to minimize patchiness. Trigger the gun before each stroke and release before ending it to apply the paint evenly. Overlapping each pass by 30-50% will seamlessly blend the paint and prevent a striped appearance. Don't forget to start from the top and work downwards, and always spray the edges and corners first.
With these expert tips, your spray painting project will be a breeze!
-
Benefits of a Paint Sprayer
7 July 2023The paint-sprayer is truly a game-changer in our fast-paced world, where efficiency and speed are highly valued. These incredible machines can paint an entire room in just 10 minutes, saving you valuable time and energy. But the benefits of these machines don't stop there.
Airless Paint Sprayers For Hire
They also offer a smooth and even coat, making your walls look flawless. Whether you have textured surfaces or dark walls, the paint-sprayer provides excellent coverage, ensuring a professional and high-quality finish. Moreover, it is perfect for quickly completing large paint projects, allowing you to take on more jobs and increase your productivity. The HVLP technology also makes detailed paint jobs a breeze, giving you precise and flawless results. Additionally, these machines are versatile and compatible with a wide range of paints, making them suitable for any project. And let's not forget about the health benefits. With the paint-sprayer doing the hard work, you can say goodbye to constantly bending down for more paint, saving you from unnecessary strain.
10 Benefits of Paint Sprayer
- SMOOTH EVEN COAT
- WORKS ON TEXTURED SURFACE
- GREAT COVERAGE OVER DARK SURFACES
- COMPATIBLE WITH A WIDE RANGE OF PAINT
- PROFESSIONAL HIGH QUALITY FINISH
- HEALTH BENEFITS
- THE HVLP IS PERFECT FOR INTRICATE JOBS
- PORTABLE & LIGHWEIGHT
- QUICK & EFFICIENT INCREASING PRODUCTIVITY
- HIGH TRANSFERENCE RATE - LESS PAINT TO COMPLETE THE JOB
However, whilst the benefits are extensive, it's also important to consider the maintenance and servicing costs, as well as the initial financial investment. And while spray guns are designed to spray precisely, there may be some overspray, requiring careful preparation using masking tape and drop film to protect surrounding areas.
Looking to save time with plastering or painting? Check out our range of airless paint and plaster spray machines! -
Keep Your Machines Humming: The Importance of Regular Service and Maintenance
29 June 2023When we arrive at site each morning we simply expect to fire up the rendering/plastering/screeding/grouting machine and get the job done. However this won’t always happen if you push your machine to the limit without giving it some TLC inbetween. Servicing and maintenance is crucial for so many reasons which we’ll explore in this blog.
Learn More About Our Machine Maintenance Services
What happens if I skip a service?
If you’re someone that tends to wing it and think, ‘what’s the worst that can happen’; you’ll no doubt feel a huge sense of frustration if your machine suffers a malfunction. Not only is this kind of unexpected breakdown inconvenient but it can also end up costing you more and having a bigger impact on your work and company. From your machine suddenly tripping out, to issues with the pressure dropping and of course the dreaded blocked hoses, all of these unplanned problems become a real headache when it happens mid-spray/install.
Why is service and maintenance important?
1. Lengthens the lifespan of your machine
If you work your machine to the bone it increases the stress on the machine. Regular service and maintenance keeps it working at optimum level for longer. Become familiar with the wear parts such as mixing paddle and/or rotor and stator and assess these regularly. Also, keep grease- points lubricated so your machine runs at its best in between services.
2. Saves you money in the long-term
Whilst you may feel smug to save the pennies and skip a service, if you’re running a machine that is damaged, it will not be working efficiently. This will cause further damage costing you more when you eventually decide to service.
3. Lowers the risk of breakdowns
Keeping on top of your machine maintenance and going on the ‘prevention is better than cure’ mantra should reduce the risk of a sudden and unplanned breakdown. We recommend servicing every 150 hours.
4. Avoids Unplanned downtime
When you don’t commit to regular servicing, a sudden problem is more likely to occur. This can be incredibly frustrating midspray and does not only mean halting procedures on the current job but also causing delays on future jobs. Especially when you factor in that you may not be able to get your machine assessed and repaired immediately.
5. Increases machine efficiency
When your machine is thoroughly serviced and maintained, it will always run more efficiently. Consequently, this means quicker application and less material wastage; all positives for the contractor and customer.
6. Boosts customer satisfaction
Running to time on jobs, showing up with clean well-maintained machines and showcasing a slick spray/pump process (not one where you have to give the machine a good kick to get it started) will create a great impression on customers. They’re also more likely to positively review and recommend you.
7. Ensures better finish
With plastering, rendering and flow screed, it’s all about the smooth perfect finish. If your machine is running at optimum level, it is going to create the desired flawless outcome whilst spraying efficiently and wasting less material.
8. Improves company image
Sites are often dusty and dirty places and can leave machines in a bit of a mess plus the dirt is abrasive and can impact your machine mechanisms. Maintaining your machine by keeping it clean is a priority and will enable you to spot faults more easily as well as improve your company image.
9. Promotes health and safety
Health and safety is of utmost importance when on a site with plant machinery and a damaged or deteriorating machine could cause an accident. Equipment to look out for include perished hoses which under pressure can split and cause an injury. Tow bars (for road towable units) are also important to check since a damaged tow bar could harm the driver, other road-users and pedestrians.
What Can I do?
As well as booking your machine in with a reputable servicing company (don’t forget CES service many machines even if you’ve not purchased from us), there are things you can implement to keep your machine in tiptop condition. I think all the guys in our workshop would agree with the number one priority being, keep your machine clean! Read our blog on why this is so important here > It is also worth keeping spare parts on standby, for example a rotor and stator which you could quickly fit mid-spray if you needed to. Finally performing those daily checks and getting familiar with your machine will really pay you back. Make sure you’re greasing parts, topping up oils, checking hoses and filters. For more detailed and specific guidance on maintenance of machines, check out one of the blogs below:
- How to properly maintain your forced action mixer
- How to maintain your rendering machine
- How to properly maintain your screed pump
-
How Do You Achieve Great Results With Floor Screed?
20 June 2023Do you have a flow screed pump? Are you using it to its full potential? Today, we dive into how you achieve great results with floor screed. Read on to find out more...
How Do You Achieve Great Results With Floor Screed?
Go With The Flow
Liquid flow/pumpable/self-levelling/self-smoothing screed; whatever you call it, this relatively new screeding process is becoming increasingly popular across the UK.
Liquid floor screed is applied over the existing substrate to create a supremely smooth, level, flat surface. Since it is liquid, it finds its own level so is perfectly even and flows beautifully around heating elements to encase underfloor heating.
Advantages Of Flow Screed
Builders are quickly noticing the advantages of using liquid flow screed.
- It's fast - it takes around 20 minutes to lay 25m²
- Saves you money - in labour and time
- Save on materials - it lays as thin as 35mm (materials can vary)
- Works alongside underfloor heating - allows easy heat transfer
- It's VERY level - no amount of experience can match the science of liquid leveling
Less susceptible to shrinking - needs fewer expansion joints. Any large tiles laid on it will be less prone to cracking.
Size Really Does Matter
It is essential to get measurements correct. If you’re a little slap-dash with the room measurements, you may find that you end up with too little screed. This would be problematic since even if you were fortunate enough to get hold of more, your first batch may have already gone off. Three important things to mention are:
- The accuracy of the mix ratio for floor screeding is crucial.
- Mixing batches is not advised as it can lead to irregularities.
- Ordering too much can be a pain and a waste of money.
You’ll have to dispose of it and a solidified wedge of screed is not going to be the easiest thing to get rid of. We recommend having a ‘HIPPOBAG’ to hand so you can collect any leftover screed and dispose of the excess screed in your hose etc. These bags are ideal as they allow water to drain through and will just collect the screed.
Prep To Perfection
Preparation is key in so many building processes and laying flow screed is no exception.
Always aim to start with a clean and tidy blank canvas; so, grab that broom and remove the dust and debris.
Priming the existing substrate will eliminate the suction which would mean the screed dries too quickly. An SBR primer will do the job but if grease is present use a liquid DPM.
It is crucial to lay a watertight membrane since the flow screed will just spread to the shape of the room it is pumped into. A polyethylene sheet of 1000 gauge or thicker will do the trick. Make sure the polyethylene curls up at the edges and is stuck to the wall, keep corner folds neat and tape any joins.
Read More About Preparation Here
Ready, Steady, Flow
Now it's time to pour! As with many materials it, is vital to work in the correct temperatures, over 5° and below 30° is advised. Working in extreme temperatures alters the drying time; drying too quickly can reduce the strength of the screed.
Don’t forget those safety wellington boots since you’ll be wading through the screed as you pour. The liquid screed will be the consistency of cream so watertight boots are an absolute must.
Once the screed is laid, it must be left to dry following the rule of one day for every mm up to 40mm and 2 days for depths over 40mm. However, the screed will be dry enough to walk on after 24-48 hours.
Our Most Popular Screed Pumps
Euromair X-PRO D200 - Buy Now
Euromair X-PRO D140 Liquid - Buy Now
Euromair X-PRO E100 - Buy Now
If you'd like to make an enquiry or ask any questions, you can click here, or call us on 01494 715472.
-
Top 10 Tools to Make Liquid Flow Screeding Easier
15 June 2023Liquid flow screed is certainly having a moment in the construction industry currently as an increasingly popular method of quickly laying a strong and supremely flat subfloor. There are many benefits to choosing to apply liquid flow screed and it’s a great investment for both builder and customer. Advantages include:
- Quick application by pouring in one go rather than back-breaking shovelling. Flow screed can be applied ten times quicker than traditional screed pumping 25m³ in 20 minutes
- Speedier finishing with no need to compact, sand or scrape. It simply requires a quick tamp of the dapple bar to release air
- Much quicker drying time. Whilst products vary you can typically walk on the surface after 24 hours and some flooring finishes can be laid as quickly as 7-14 days later. Traditional screed is frequently laid to a minimum of 50mm depth with a day of drying time per mm, however liquid screed is laid at a much thinner 25mm-35mm depth.
- By pumping liquid flow screed using a machine you are gaining all the health benefits of less strain on your body as you won’t be stooping and shovelling heavy material
- It is less susceptible to shrinkage and needs less expansion joins
- It provides a much stronger and more durable surface ideal for high-footfall spaces such as commercial or industrial buildings
- Long-term this solution is far more energy efficient and perfect for underfloor heating as it completely surrounds the elements and distributes the heat incredibly well.
Tools for Preparation
Screed Flow cone and plateA screed slump test kit is essential prior to an installation. A flow cone and plate will check the consistency of your liquid flow screed and ensure it is workable. It shouldn’t be too wet or too dry. This testing kit will check the slump and flow in accordance with BS8204-7. The correct consistency will prevent drying shrinkage and other problems. To use, simply place the cone on the plate, fill the cone with screed and remove the cone. The spread is then measured to determine flow-ability.
DPM Polyethene Sheet
DPM (damp proof membrane) is an essential part of your preparation. Since liquid screed is free-flowing you must install a layer of polyethylene to encapsulate your screed and prevent it from escaping. This watertight protective membrane should curl up at the edges and be secured to the wall. 1200 gauge DPM is also used to stop moisture from the ground entering a property, particularly important when working on the ground floor. The polythene will not only protect the property from issues such as rising damp but also protect the screed and subsequent flooring finish. Polythene sheeting is also advised when installing your underfloor heating systems.
Pump Primer
You should never pump through dry hoses and we would recommend using a pump primer to prep your hose before a liquid screed install. A pump primer not only protects your hoses and keeps them in much better condition for longer but it also helps the job run more smoothly and get completed quicker. A primer eases the pressure on the material being pumped and optimises pumping capacity. The increased ease of material flow will also prevent hose blockages.Tools for levelling
Screed Levelling TripodsA level floor is an absolute must and whilst liquid flow screed will ensure a supremely smooth surface, you need to pour to the correct level across your project. This is where screed levelling tripods step in and are a key tool for screeders and groundworkers. These stainless steel tools ensure your screed is installed to the correct and desired level. They are essentially a three-legged device with a central screw threaded shaft at the base of which is a circular disc. This disc can then be raised or lowered according to your levelling requirements. These tools are used in tandem with a laser level to ensure all the tripod levels match. The tripods should be placed 1-2m apart and should be removed and cleaned promptly after pour to ensure the screed doesn't set on them and cause damage.
Laser Level
Once the datam level has been determined (this is the required level of the floor prior to the flooring finish), your laser level can be put to work. This very handy tool will project a straight level line onto walls and floors. This ensures all your screed levelling tripods are perfectly aligned and will achieve the most precise results.
Tools for Finishing
Dapple Bar
A dapple or tamping bar will remove air bubbles in your liquid/self-levelling screed. Removing air pockets will ensure you achieve that perfectly flat, smooth surface finish. With your first tamp you should be a little more vigorous with the movement to release the trapped air and the second you can be more gentle to create the desired smooth finish.
Concrete Placer
Whilst installing liquid flow screed is generally all about manoeuvring the hose around the project area and allowing the material to do the hard work and level out, you may find you need to re-distribute material. This is where a concrete placer (also known as a spazzle) can be a handy tool to have in your kit. This lightweight tool will easily move and redistribute screed.
Spiked Roller
A spiked roller or aeration roller can be useful to have on hand to remove bubbles or trapped air present in floor levelling compounds. This tool rotates to evenly aerate the material ensuring complete uniformity as the floor cures.PPE
Wellies
When using any kind of building material, PPE is vital to protect yourself and your colleagues. Installing liquid flow screed means you will inevitably be wading through the material itself as the hose pumps out the screed. Direct contact on skin could cause burns and skin damage so safety wellington boots are essential as well as full length clothing so areas of skin are not exposed to any chemicals. Always be sure to read safety data sheets for full details of specific hazards of each material you use.
Gloves
As you’ll be handling machines, hoses and tools that come into contact with liquid flow screed, it is important to wear gloves. As mentioned above, exposed areas leave the skin susceptible to splashes which can go unnoticed and cause lasting damage. Always find well-fitting gloves that allow you the dexterity to carry out your job with ease whilst protecting yourself.
Tired of your current suppliers letting you down?
We have a wide range of products available to hire or buy.
-
How to Clean your Plastering Tools
19 May 2023To achieve the very best plastering finish, it’s all about keeping your tools clean. Plastering by hand or with an airless plastering machine requires you to finish the surface in the flattest and smoothest way possible using spatulas or floats. If your tools are caked with dried plaster you’ll struggle to glide over the surface and won’t be able to achieve that even, top-quality plastered wall. Here are our top tips for keeping your plastering tools super sparkling.
CLEAN IMMEDIATELY - First and foremost, we would suggest investing in high-quality tools as these will stand the test of time and withstand multiple cleaning. Cheaper tools can often look dull and tired very quickly as they are not built to endure frequent buffing, scrapping and scrubbing.. Whether it’s hawks, trowels, floats or spatulas, the best advice we can give you is to clean as soon as possible after plastering. Once plaster dries on and the longer it stays on, the more stubborn it is to remove. If you get delayed and can’t get to that crucial cleaning in time, here are our suggestions for how to get your tools back to clean and shiny.
SOAK & SCRAPE - Soak handheld metal tools overnight in water and baking soda. This will soften the plaster and you can then scrape it off with a putty knife or similar. If any stubborn layers remain you can continue to clean with a scouring pad.
SAND - Sanding your tools lightly with 400 grit sandpaper will bring back the shine on your metal.
WHITE VINEGAR - Rust can be a problem with metal tools and there are various solutions. The cheapest way to treat rust is to soak the tool in plenty of white vinegar overnight then scrub with coarse steel wool until the rust comes off. Rinse the tool thoroughly in clean water and then pat dry. This method of rust-removal takes time and effort and you can buy products that work much quicker such as WD-40 Rust Release Penetrant which can work in as little as 30 minutes. You can then follow up by buffing using a drill with a rust/paint stripper attachment.
RUST-PROTECTANT - Prevention is also better than cure and there are ways to rust-proof your tools to begin with. Using a rust protectant will extend the life of your tools and prevent corrosion. These products are applied to your tools by an aerosol spray enabling you to coat all sides lubricating the metal all over. Always pay close attention to small screws and bolts that are prone to rusting.
PROPER STORAGE - When it comes to storing your tools, ensure you dry them thoroughly once clean and place in a moisture-free area. As the majority of your tools will be metal, exposure to moisture causes rust which affects the quality of your tool.
-
CES in Partnership with Euromair
11 May 2023At CES we have been working alongside Euromair for over ten years. Within that time we are proud to have become the UK's largest Euromair dealer. We have been delighted to help countless customers who have hired and purchased some of the most up to date pumping, mixing and spraying equipment on the market from Euromair.
We have a fantastic relationship with the team over in France who supply us with a range of rendering machines, airless plastering machines, grout pumps, liquid flow screed pumps as well as parts. Whilst we know many of our customers rely on us for a full backup service on their Euromair machines, we can similarly rely on turning to Euromair for support from the manufacturers themselves.
In April 2023, CES General Manager Ben headed to the Euromair premises in the south of France. Having spent two days at Euromair HQ, Ben was incredibly impressed by the slick processes and operations that results in such top quality machines. Off the back of Ben's visit, we have been awarded with a Euromair Trained Distributor Certificate. We're delighted to have been recognised by Euromair in the services we provide at CES. We're incredibly lucky at CES HQ to have some real technical expertise when it comes to our Euromair range. We have team members skilled in machine trials, servicing and repairs as we've really got to know the Euromair range over the past decade.
-
Mix It Up: 8 Must-have Features to Select the Perfect Forced Action Mixer
4 May 2023Forced Action Mixers or Pan Mixers are a fantastic piece of kit with superb mixing capabilities. They are often the chosen machine for installing resin driveways/surfaces and certainly make the process more efficient (take a look at more benefits of a Forced Action Mixer here >). As a fairly large expense, you want to ensure you are selecting the right mixer for your needs. With so many mixers out there there are some key things to consider when choosing your machine. We’ll run you through our must-have features to look out for when selecting a machine.
Low Maintenance
Mixers are relatively low maintenance machines so the cost of their upkeep is relatively low. With a robust design, they really are built to last and are incredibly easy to clean as long as you keep on top of your cleaning. Check out our blog on Mixer Maintenance for more information > Clean promptly once you’ve completed your mix to prevent material drying on the drum and becoming a challenge to remove. The drum, mixing paddles and outlet/trapdoor are essential elements to keep clean so look at how accessible those parts and in the case of the blades, if they can be removed simply to enable a thorough clean.
Safety Features
Safety is imperative when using any machinery so if a mixer brand is prioritising your safety this is another tick on the list. Look for simple, well-designed safety aspects. Features such as accessible emergency stop buttons, safety outlet grill, zero voltage release, robust frames and stable pans are elements to look out for when hiring or purchasing your mixer. Brands such as Baron design mixers that immediately cut off the power when the safety grill is lifted.
Portability
When you’re zooming from project to project, having a portable mixer is essential. Most mixers are designed with wheels to easily manoeuvre around the site by a single person. Look for hardy wheels/tyres that can withstand the uneven and rough site terrain. It is also advisable to check out the mixer weight. A lighter-weight mixer makes life much easier when loading the equipment into your van.
Mixing Capabilities
Forces Action Mixers are certainly an upgrade on the old-fashioned cement mixer (read more on this here >) and one of the upsides of mixers is their mixing versatility. Forced action mixers are suitable for both commercial and residential use. There are also a range of sizes available with smaller and larger mixing capacities so be clear on the most suitable size for you when considering your mixer purchase. A Forced Action Mixer can cope with a wide range of materials including:
- Cement mortar
- Resin bound aggregate
- Rubber crumb
- Specialist screeds
- Traditional lime based materials
- Concrete Repair and Coatings
- Resin Bonded
- Screeds
- Wet Pour Safety Surfaces
- Polymers
Design Features
Mixers are designed to make your life easier and reduce manual labour. They are generally very simple to use therefore can be used by tradesmen that are just starting out as well as more experienced professional craftsmen. Look for a mixer that has been designed with ergonomics in mind, with features such as
- An outlet height for easy use
- Adjustable mixer shovels
- Easily operated by a single person
- A motor shield to protect against dirt
- Practical handles for easy-loading
- Easy to clean and maintain
- Light-weight and portable
Servicing & Parts
Whilst mixers are very low-maintenance, it is always reassuring to know that parts are easy to get hold of should you need them at short notice. In the event of a breakdown, you want to be sure that a good range of parts are available. At CES our servicing department stocks a wide range of parts and accessories that can be quickly shipped to enable you to swiftly continue with your install without too much interruption. When selecting your mixer, you should also be aware of servicing depots that can support you with technical queries or servicing needs. Again, this is something CES can assist you with, having a great servicing department with superb experience and technical expertise.
Warranty
Always ensure your mixer comes with a warranty (many will be a 12 month option). It is also worth checking whether you need to register your equipment to successfully protect your machine.
Brand Reputation
Brand reputation and customer reviews about the mixer you’re pondering is certainly something to consider in your decision-making process. With social media so prevalent, it’s incredibly easy to find authentic reviews of machines from the guys that are actually using them. Check out the brand behind the machine too, are they reliable and focused on consistent quality and performance of their machines? Do they seem professional and have a focus on customer support and safety?
-
How to Maintain your Render
27 April 2023If you clean your render properly, you’ll reap the rewards in terms of your render remaining trouble-free as well as looking smart. Regular maintenance will ensure your render continues to offer the best protection for your walls and home's structure and it should last for more than 20 years. A good cleaning process means you’ll avoid stains, mosses, algae, mould and fungi. Render can be cared for easily simply using household products.
Render Problems
Render damage can be surface level such as stains or mould but can also be more structural for example cracks in your render. When it comes to cracks, you should act swiftly to prevent further damage that can occur with water seeping in. For further details on repairing cracks or blown render check out this blog >.
Surface-level issues you may come across include:
- Vegetation growth such as green algae, moss, vines and fungi
- Areas of damp which occur more in north-facing homes, homes with less direct sunlight or those surrounded by trees or woodland
- Mould or mildew can occur in areas of high-humidity . Mould spores can settle on coated surfaces, hatching out and drawing nourishment from the coating. They can continue to grow even after they have seemingly been removed.
- Finally there's the aesthetic element-render problems can look somewhat unsightly.
How to keep your Render Sparkling
In the first instant, you can look after your render relatively easily just by cleaning by hand and scrubbing with a stiff broom which should get rid of any greenery (moss/algae). Always follow by hosing down to remove the grime otherwise a dry grime and residue film can build up which can be stubborn to remove.
A light jet-wash on your property every 6-12 months should prevent algae and mould and if you keep up your maintenance schedule, it should avoid the need for harsh chemicals to be used.
A simple freshen up and stain removal can be achieved by using a pressure washer and mild detergent (avoid this for dry-dash surfaces). With a pressure washer make sure you use the fan-setting, not the jet-wash. You’re looking to spray at around 80-120 psi. You also shouldn’t spray too close as the pressurised water could penetrate the surface. Look to be at least 20 cm away.
You can apply various products that offer a layer of protection particularly if you live in an area with a harsher climate. Products such as Weber Weberend Protect are an easy to apply solution that can be applied by spray, brush or roller. This will maintain the quality of your render as well give further protection.
If you are specifically removing fungus, it may be worth using a fungicidal wash. You can find certain renders have fungicide and herbicide built in within their formulas which prevent such growths.
Finally, why not use a professionally created formula for render or brick such as Weber CL150 which is specifically created to keep many bacterial, fungal, yeast and mould species at bay.
-
Forced Action Mixers: The New, More Versatile Cement Mixer
27 April 2023Forced Action Mixers: The New, More Versatile Cement Mixer
Move over Cement Mixer…There’s a New Kid on The Block
The cement mixer has long been a staple piece of kit on a building site and is often chosen as people are not familiar with or aware of an alternative. However, when it comes to mixing materials, the Forced Action Mixer really does lead the way and copes with the most demanding of mixes. The Forced Action Mixer which is also known as a resin mixer, pan mixer, upright mixer or agitator mixer is an upgrade on the traditional cement mixer achieving a more thorough and consistent mix in a much quicker time. For more on the Forced Action Mixer click here >
The Cement Mixer: A Blast From the Past
The cement mixer has often been the go-to for mixing materials having been around since the early 1900s. The rotating drum means it relies on gravity to mix the material. Whilst it is a pretty solid piece of kit, it doesn’t quite last as long as the it’s successor The Forced Action Mixer. It is mostly suitable to mix sand and cement or concrete mixes and doesn’t have quite the versatility of a pan mixer since it can only be used for smooth, non-viscous materials.
The Modern Way to Mix
The reliable Forced Action Mixer is designed with a powerful motor which means speedier and more efficient mixing. The machine also has greater mixing capabilities and can cope with lime putty, render, resin-bound gravel, sand and cement, paint, epoxy resins, mortar, concrete, screeds, plaster and polymer-based minerals. The pan mixer is designed with arms/blades that rotate within a static drum. The blades reach all corners and prevent dry spots. The mixing arms are incredibly robust and cut through the material to ensure a thorough mix.
Benefits of a Forced Action Mixer
The Forced Action Mixer is really at the top of its game for mixing a variety of materials. The benefits include:
Increased mixing speed means that material can be mixed in 3-5 minutes enabling more material to be turned around and projects to be completed more quickly.
Superior efficiency with mixing enabling more accurate planning of jobs and estimation of mixing times
More powerful motor operating the mixing blades to create a more consistent and even mix.
Achieving an extremely well-blended mix with an improved water absorption. This means the mixer can also cope with earth moist concrete which can get very wet however the pan mixer will properly achieve a lump-free mix.
A versatile mixer with greater mixing capabilities eliminating the need for multiple bits of kit.
A portable machine enabling both indoor and outdoor work as well as easily manoeuvred from site to site
Needing minimal maintenance especially if you keep the drum clean. For more on maintenance head to this blog >
Durability and reliability with well-designed safety aspects. The emergency stop features mean that if the grill is lifted the machine immediately cuts out.
Mixers Available at CES
At CES Hire we stock Baron Forced Action Mixers which are available for hire and purchase. These powerful mixers are available in a variety of sizes to cope with different job specifications. Find out more about our mixers for hire here >
-
Plastering in All Seasons: Understanding the Seasonal Impacts on Your Walls
21 April 2023We wouldn’t be British if we didn’t like a good chat about the weather. However, the weather is fairly crucial for those in the plastering industry so you may find yourself on daily weather watch. With plastering being a process for internal walls, you would think that the weather wouldn’t be a problem. However the seasons certainly should be considered especially when planning your job and factoring in the time the plaster takes to cure.
The Impact of Cold Weather
Cold weather will of course increase the setting time of your plaster meaning you should plan in additional time to complete your job. If it is a prolonged cold spell, your plaster may in fact never fully dry as water is unable to evaporate at cold temperatures. Since water is added to pre-bagged plaster, temperature is an important consideration. Water freezes at 0°C so it is crucial to maintain a temperature of at least 4.4°C whilst plastering and for 48 hours afterwards. The strength of the plaster will be compromised with slower water absorption. Keeping temperatures as constant as possible is key as fluctuations can cause movements in the substrate.
What can you do?
In cold conditions you can use warm air heaters to increase the temperature. We would advise to gradually warm a day prior to plastering so as not to cause a sudden temperature rise and therefore condensation from warm air coming into contact with cool surfaces. You can also store your tools in a warm place. Cranking the heating up to blast the room with warm air is a no-no as you want the plaster to dry as naturally as possible to cure the plaster properly and allow it to gain strength. If you are putting the heating on, keep it on low (not above 17°C).
The Impact of Frost
Frost is a nightmare for plaster with building authorities such as NHBC advising you to avoid plastering if conditions are frosty. You should also protect your plaster from frost for at least 24 hours after it has first set. Plaster should never be applied to frozen substrate since it can freeze on the wall, weaken and fall off.
What can you do?
Just as above with cold temperatures, the only way to avoid frost is to warm the area you are plastering in, however this should be done gradually and the room should never become excessively hot. Don’t forget, the optimal plastering temperature is 15°C.
The Impact of Heat
Extremely dry and hot conditions can cause plaster to dry out too quickly, weakening the material, causing cracking and losing flexibility. This can subsequently create a powdery surface which is not a quality surface for the decorative coat. The wall temperature will also affect your plaster; if the surface is too warm it will draw moisture from the plaster.
What can you do?
In hot conditions try a test area to see how long an area is workable for; this will enable you to understand how much plaster you can apply and finish within a set amount of time. Consider the time of day you are plastering. Avoid direct sunlight if possible by starting plastering earlier in the day. You can also keep your tools in a cool spot. Plasters containing cement can be particularly sensitive in the heat so you may need to continually dampen the surface by fogging so the material doesn’t dry too quickly.
The Impact of Moisture
I say moisture in this instance since I’m not only referring to rain but also humidity or condensation. If there is moisture in the air it can slow down the curing of your plaster. If it is a short burst of humid weather or a cold snap that has created condensation inside a warm home, you may be able to plan around the weather however if it is an ongoing damp problem, this can have significant issues. If the moisture is lingering then it could mean it completely stops the plaster drying out or it takes weeks or even months. Continuous damp conditions are unsuitable plastering conditions because if the plaster cannot cure correctly, it is unable to gain full strength. If the plastering remains damp, a subsequent decorative coat cannot be applied properly.
What can you do?
Warm air heaters could be a solution to dry out moisture and damp. However, be sure to ventilate the room you’re working in to avoid further moisture and condensation. Moving cooler air is better than warm stagnant air. Warming the room slowly the day prior to work can be a good solution to remove the dampness without creating further condensation or overheating.
Weather and conditions are equally important to be aware of in terms of storing your materials. Take a look at our blog here for more advice and guidance>.
-
How should I store my Plaster or Render?
14 April 2023If you store your materials incorrectly, you may find yourself with problems before you even get started on your plastering or rendering job. Moisture is the enemy and will damage your material causing lumping and partial setting. The quality of your plaster or render will then be compromised with problems of quick set or early stiffening. The issues may mean that a pallet of product is completely unusable and as well as wasting money, may also slow down your job. Find out more about how the weather can affect your render or plaster here >
The Problem with Storing Plaster and Render
Pre-bagged render and plaster is mixed with water in order to create a pumpable/sprayable consistency. The powdered material reacts with the water to achieve that creamy mix which can be applied to your walls. However, if moisture/damp/water/condensation unintentionally comes into contact with your product before the job begins this will cause problems. You should protect your material from
- Contact with rain, snow, frost and splashing water
- Direct contact with wet or damp surfaces
- Absorption due to high humidity levels
- Condensation which often occurs when waterproof plastic covering is used as moisture gathers during the warmth of the day which then condenses when it is cooler overnight.
How can I protect my Plaster or Render?
Ideally you should store your material inside or under cover in some form to ensure it remains dry. We advise to
- Stack on planks or platforms away from possible damp floors/walls
- Ensure the floor is clean and dry
- Keep the material in it’s packing until use
- Always protect bottom bags with vapour retarder
- Ensure you protect the bags from excessive sunlight/UV rays
If storage is limited and you need to store outdoors, take note of the following guidance:
- Stack off the ground supported on a level platform
- Protect fully from the weather/moisture by placing a sheet of plastic/vapour resistant material on the material platform
- Ensure your plastic sheet extends 2ft beyond the base edge
- After stacking 1-2 layers fold the plastic in to overlap the bags and continue stacking (the weight of the bags will hold the sheets in place)
- Cover the completed pile with a protective sheet/waterproof tarpaulin
Condensation can be a big problem for render/plaster. Condensation occurs when warm moist air comes into contact with cool surfaces. This problem generally comes into play the longer you store your material with the temperature increasing in the daytime and then dropping and cooling at night. If you are storing your material for over 12 hours only use waterproof tarpaulins as they allow the contents to breath enabling condensed trapped moisture to escape and vaporise, plastics won’t allow this.
Ideally, get your material delivered as close to your project start day as possible to avoid any storage issues. Please also be aware that render and plaster does have a shelf life and the manufacture date will be marked on the bags. Whilst it varies by brand of render/plaster, generally render should be used within 12 months from the batch date.
-
Painting Prep=Perfection: How to Boost your Productivity and Make Your Customers Happy
11 April 2023Rarely would you come across a wall or surface with no complications for your painting project. You will always have edges where the wall meets another wall or the ceiling. You will perhaps have baseboards or mouldings. You could also find plug sockets and switches. All these intricacies may feel like they’re slowing you down. However, with the correct preparation, these things needn’t be a problem.
Do Professional Painters Use Tape?
Painting a room is such a simple way to transform a space. When you spend a great deal of time in your home, it’s important to invest time in updating the look and feel. If you’re itching to make the changes quickly, it can be tempting to grab a paintbrush and go. However, if you do not adequately prepare, you’ll find the entire job may take you longer. You may think that professional painters have the technique nailed and have mastered the steady hand and don’t bother to tape up. That’s where you’re wrong. Professional painters will always prioritise preparation preparing a space by:
- Moving furniture
- Laying polythene or other protective covering
- Cleaning baseboards
- Dusting walls and removing other dirt
- Applying painters tape
Why use Painter’s Tape?
Painter’s tape is a superb product designed with the latest technology that makes it a superior product to ordinary masking tape. Check out our blog to find out more about the difference between painters tape and masking tape>. So what are the advantages of using painting tape?
- Gives a super professional finish
- Creates crisp and clean bleed-free lines
- Enables you to paint a straight line
- Prevents paint going on moulding, ceiling and baseboards
- Allows you to mask off switches and sockets
- Avoids mistakes of paint ending up on undesired surfaces
- Prevents a long clean up process and correcting of mistakes
- Enables you to paint much more quickly going up to the edges
- Achieves shapes, designs, patterns simply using tape
- Adheres to a range of surfaces (windows, ceilings, walls, furniture)
- Does not leave residue or marks when removed
- Ensures a happy customer
- Find out more about how tape can improve your decorating results here>
How to use Painter’s Tape like a Pro
As with anything, ‘all the gear and no idea’ will never get you the best outcome. However, if you are clued up on the best practice for using your painters tape, the results you can achieve will ensure a very happy customer.
- Always invest in quality tape as it will have the innovative technology to create a barrier that seals the fresh paint and prevents seepage
- Select the right tape for the job depending on the surface you’re applying to e.g. sensitive or extreme
- Ensure you are applying to a clean and dry surface to make sure your tape properly adheres to the area
- Try not to touch the adhesive side as this can contaminate the tape and prevent it from sealing to the surface
- Don’t cut pieces of tape but simply unroll the tape and use your finger to guide into position
- Use a flat, straight edge (e.g. a putty knife or credit card) to press the tape down and secure in place
- Wait around 60 minutes for proper adherence before you begin painting
- With regards to removal, wait 24 hours to peel off the tape, carefully lifting and pulling back on an angle to ensure a professional result and a clean straight line.
- For further tips and tricks when using painting tape head here >
-
How to Create a Pumpable Grout Mix
24 March 2023Mixing your own grout/mortar can be a great way to keep costs down on your project. However, mixing your own material can have its challenges. Grouts are a delicate balance to achieve since they tend to have a thicker consistency yet still need to be flowable to make them pumpable. Materials with aggregate tend to be best to create a strong material though there are many other variables to consider such as water quantity, grading, pumping distance, hose diameter and additives. Read on to find out more about creating the perfect pumpable mix.
What are the challenges with mixing your own grout?
The main challenge with pumping your own grout mix, is the tendency for material separation. Grout is made up of sand, cement and water. Water is the only element in this trio that can naturally be pumped so in order to pump sand and cement, it needs to form a mixture in which the solid materials are surrounded by and lubricated by a cement paste. Whilst solid materials can be pumped in water at a high speed, the amount of water is limited within grout and often must be pumped at slower speeds due to the bore of pipelines or delicate grouting processes. Another challenge is getting the properties right for the application method. The mix of your material can vary depending on whether you are spraying onto a vertical surface, screeding off or trowelling by hand. Generally the higher the viscosity of the material, the less likely it is to separate, however the thicker the mix, the greater need for higher pumping pressure which can cause separation. So how do you get the mix right to avoid segregation of material?
Water Quantity
Whilst some people claim ‘wetter is better’ in order to allow the product to flow, this is generally not the case. To produce a quality material, water content should be kept to a minimum, a thick batter consistency is a great way to describe it.. The incorrect quantity can simply cause separation of your mix. A great way to illustrate this separation when a mix is too wet is to remember that last time you were on a beach searching for the perfect sandcastle-building sand for the kids. When you squeeze sand that is too wet, you’ll find the water simply sieves through your hands and leaves a clump of sand in your hands. This is exactly what can happen with your grout and these ‘clumps’ of solid dry material are likely to block your hoses. Water should also be clean and free of sulphates or other dissolved chemicals. Water is a particularly important component within grout as it is this element that combines with the solids to form the paste that bonds the other particles together. This paste will fill the voids between the larger solid particles and create the desired pumpable mix.
Aggregate and Grading
When it comes to your aggregate, for example sand, you need to consider the shape, size, ratio and grading. The proportion of elements such as sand in your mix is important . Cement sand ratio of 1:1 or 1:2 is unlikely to separate unless it is too wet, however the normal ratio is between 1:3- 1:6 and it is within this mix ratio that separation can occur. This is where grading your aggregate is crucial, this means your aggregate size steps down in size with an even mix of aggregate sizes, this helps the material bond together much better. With careful grading the paste that holds the grout together will be less likely to escape and the mix of aggregates sizing reduces the void spaces to be filled. Angular particle shapes are preferable for your grout mix as they give greater resistance, again preventing the paste escaping and therefore the mix separating.
Pumping Distance and Hoses
Ideally pumping distance should be kept to a minimum and hoses should be kept straight. Keeping your grout pump close to the area of work to allow material and water access for mixing and cleaning is useful if your project allows it. Your hose diameter will also have a bearing on material separation. A sudden reduction in hose diameter can increase pumping pressure and cause separation of material. Larger diameter hoses will allow the product to pump more easily; we would recommend around a 50mm hose for grout. Steel pipes will also have an advantage for pumping grout as there is less resistance with a metal pipe as opposed to a rubber hose.
Pumping Pressure
Grading your material also comes into play when considering your pumping pressure. If your sand/aggregate is not graded, the pressure applied to the water will be rapid but the sand will pack together and behave like a solid creating high frictional resistance. If pumping pressure is particularly high, material separation is more likely to occur. Piston pumps may have a tendency to separate more than other types of pump due to their fluctuating pressure. A sudden pressure difference (due to a change in hose diameter) can cause the paste to separate from the aggregate and leave a dry-packed plug of larger particles.
Additives
Some materials may contain accelerators to speed up setting and enable grout to strengthen rapidly. Once your material is mixed, keep it in motion and pump immediately so as not to block the hose/pump. Of course, the weather and temperature will have an impact on additives such as accelerator, with heat/sun decreasing the setting time further. You may wish to use other admixtures to modify or enhance your grout such as plasticizers, water-reducing agents or expansive agents. You should always have a good understanding of the impact such additives will have on your material consistency and refer to the manufacturers recommendations.
Tips for Mixing and Pumping
Prior to pumping you should rinse the mixer and charge the pump hopper with water to flush through the machine to remove residual material and subsequently drain this from the machine. Mix a slurry (a mix of cement and water to create a soup-like consistency) and pump through the machine to remove remaining residual water and lubricate the machine and hose. Never pump slurry through a dry hose. If you are unlucky enough to get a blocked hose, carefully remove it and flush it out with clean water. When beginning to mix your material, load 80% of the water anticipated and slowly add the cement with the mixer running. Mix to a creamy consistency before adding your filler material. Slowly add the sand until the mix just loses its cement colour. If you are opting for a premixed grout, always check the technical data to be sure it is pumpable and also determine the working time as it may not be long enough to allow you to pump.
-
Choosing The Right Rotor And Stator for your Rendering Machine
9 March 2023Rendering machines come in many shapes and sizes from Diesel machines capable of pumping 100 litres a minute to smaller electric machines perhaps requiring a little more control and therefore a lower output. The rotor and stator mechanism is a key element to consider when planning your project as you will want to match it to your machine, material (aggregate size) and desired pumping speed/pressure. The product spec sheet is your first port of call when it comes to understanding which rotor and stator works for you.
Generally the rotor and stator size reflects the size of your machine. A larger version will cope with bigger aggregate and has a greater material output. The size isn’t only an indicator of the machine size but also enables you to:
It is not only the size of the rotor and stator that influences the above factors but also the pitch (ridges/grooves on the rotor) and the shore (how soft/firm the stator is). For more information on how rotors and stators vary check out our blog here >
Below you’ll find some guidance on selecting the right rotor and stator for your rendering machine and material choice. Here are three of our popular render machines alongside the parts available for them:
Euromair MixPro 28
The Euromair MixPro 28 is a popular electric machine capable of mixing and pumping various products including roughcast, top coat, basecoat, monocouche and latex screed. The Euromair MixPro 28 is a continuous mixing pump whose pumping capabilities can be adjusted by changing the rotor and stator set up.
Rotor & Stator Material Output Used to Pump Mixer 13 10 Litres per minute Roughcast and Top Coat Mixer 26 (fitted to a new machines) 16 Litres per minute Basecoat and Monocouche Mixer 32 30 Litres per minute Latex Screed Euromair MixPro 50
The MixPro 50 is another great option for spraying render. This three-phase continuous mixing pump is compatible with a range of renders including Weber Pral M, Krend K1, Parex Monorex to name a few. The rotor and stator options for this machine include:
Rotor & Stator Material Output Used to Pump D4-3 14 Litres per minute Roughcast D6-3 (fitted to new machines) 20 Litres per minute Basecoat and Monocouche D7-2.5 25 Litres per minute Basecoat and Monocouche D8-2 32 Litres per minute Latex Screed Euromair X-Pro D80
The Euromair X-Pro D80 is a large diesel machine with much larger pumping capabilities with a 200 litre hopper so suitable for bigger projects. The batch mixer pump and sprayer is designed with a built in compressor and will cope with up to 6mm aggregate material. Here are the range of rotor and stator parts compatible with this machine:
Rotor & Stator Material Output Used to Pump 2L6 60 Litres per minute Render & Grout 2L6+++ (fitted to new machines) 100 Litres per minute Render & Grout Map 9 320 Litres per minute Flow Screed For more information or advice on your rotor and stator or more general queries with regards to your rendering machine, contact us on 01494 715472.
-
How To Choose The Right Equipment Supplier For Your Business’s Needs
9 March 2023When the equipment you hire or purchase is key to your business and livelihood, choosing the right supplier is crucial. With construction equipment it is a little more than a ‘pop to the shops and grab some milk’ kind of purchase; there is a much higher expectation from a pumping, mixing or spraying machine and you need to feel reassured that the service you are receiving is the right for you. Here are some areas we would suggest you investigate when looking for a new supplier.
Product Transparency
Cost is often the first thing you may look at when purchasing or hiring equipment. Look for a supplier who is transparent and clear about costs.
- Are costs clearly indicated on their website/in-store?
- Are there any extras associated with your equipment (e.g. hoses, spray kits for machines) and are additional costs made clear?
- Are delivery costs obvious?
- Are prices competitive?
Whether shopping online in-store the more you know and can find out about a product, the better, particularly with those bigger ticket items which are quite an investment. If you’re looking on the website, is there plenty of detail about the product? Are there videos showing it in action? Are the company technically clued-up on their products so that the support network is there should you go ahead and purchase? Is there any opportunity to trial items ahead of buying? Consider the quality of the products on offer too. With cost being key for so many, are there a range of products available at different price-points? What about the brands the company stocks are they well-established, reliable brands?
These are all key questions to ask and whilst the price is important, the service, information and support you receive when you come to using your product/machine, is equally important.
Previous Customers
Word of mouth is a powerful tool between businesses and in a world of social media where companies can communicate regardless of where they are in the country, you can now easily find out the companies with a good reputation. Ask around, have others in the industry heard of the company you’re considering going to? With the handy tool of hashtags and search functions why not look for the company in question and see what you can find out. If you’re looking for a particular machine, it can be helpful to see the machine in action with customers who have hired and purchased it, so have a dig around on social platforms (Facebook, Instagram or LinkedIn) and see what you can find. You can even directly message the company and find out more about the machine you’re considering or the business supplier you’re mulling over. You may also discover reviews via Google or the company's own website.
Back-Up Service
When it comes to larger purchases or hire of machines, you certainly wouldn’t want a company that waved you out the door and that was the end of it. With machinery things can go wrong/break-down so it is reassuring when you have a back-up service available from the company. That may be in the shape of team members available at the end of the phone to help you overcome challenges or a workshop team that can carry out repair work or regular servicing. Finding a reliable company that you feel you can come back to again and again and build a strong rapport with is important. If a company knows you by name and you’re not just a number this can be a good indication that they care about you as a company and want to offer you the best possible customer service; they’re the ones to keep hold of. Are the team behind the company knowledgeable in their field? Within construction, you want to be sure the team have great technical knowledge and therefore can help you out with your machines. You want to be sure you’re getting the best possible advice when it comes to product selection at the decision-making stage. A well-established company can often have years of experience and are great to seek advice from.
Company Values
While the term ‘values’ may seem like the “fluffy stuff”, finding a company whose principles align with yours is really important. You may have stumbled upon companies before that are all about the sale (you know those cold-callers who pester you on a daily basis yet call you James instead of Jack!) and you will instantly get a feel as to whether they’re right for you. Values you may seek out from your business supplier could be:
- Openness and honesty
- Going above and beyond
- Caring and listening
- Being forward thinking
- A desire to work together
Call the company you're thinking about working with, or message them via social platforms, often this less formal method of communication will really give you a feel for the people behind the company and whether they are the right fit for you. It’s perhaps an overused phrase however it’s very true, ‘People buy from people’ so do you really want to buy from that cold-calling company James, sorry Jack?!!
-
Rotors and Stators: The Mechanism behind your Machine
23 February 2023There are a multitude of rotors and stators available so sometimes it can be overwhelming when selecting the right set for your machine. It is important to match the correct rotor and stator to your pump taking into consideration the material and aggregate size as well as the speed/pumping pressure. If you’re not quite sure which rotor and stator is right for you, always give us a call (01494 715472) and we’ll be happy to help. Or for further information, read on and we’ll shed a bit of light on the world of rotors and stators.
Get Expert Advice
The Mighty Mechanism Behind the Machine
Many of our machines operate by rotor and stator mechanism. Product such as render, plaster, grout or liquid flow screed, is directed through the rotor and stator by a cardan or mixing shaft. The spiralled steel shaft is the rotor element and rotates inside the stator (the rubber lined stationery component) and creates conveying chambers. The conveying chambers move in the direction of flow and allow a continuous flow which pushes the material through the hose and out onto the surface. Rotors and stators vary in terms of speed and pumping/spraying output so it’s important to select the right one. Shop our range of rotors and stators here >
How do I know which Rotor & Stator fits my Machine?
If you’re not sure which rotor and stator fits your pump, the first place to look is on the product spec/data sheet. You will also generally find that the size of the rotor and stator often reflects the size of the machine. The enormous rotors and stators such as the 2L6+++ will fit big diesel machines, can cope with a larger aggregate size and will have a greater material output. A smaller rotor and stator is the opposite being compatible with smaller aggregate materials and achieving a lower material output.
Why are Rotors and Stators Different Sizes?
Rotors and stators come in a range of shapes and sizes for many reasons:
- To cope with different materials
- To pump at different pressures
- To pump at varying speeds
- To allow more control
- Personal preference when working
- To cope with larger jobs
On rotor and stator data sheets you will notice the specification is based on a standard speed on 400RPM. Quite often renderers will have a preferred rotor and stator which allows them to work at the speed that they have become accustomed too as well as have control over the time for the render to go off and subsequently be scraped/finished. You will also find renderers with greater experience may be able to work with a faster rotor and stator whilst still remaining in control. Sometimes the intricacies of a job will have a bearing on the rotor and stator choice since a block of flats with many windows may require more control than one large flat warehouse wall. When it comes to render you have to factor in time for the product to go off and whether you’re scraping the same day or the following day so your rotor and stator choice will need to be considered. Products such as liquid flow screed are pumped at a much faster speed as it sets between 30 minutes to an hour so time is of the essence and it important to fill the space as quickly as possible to ensure uniformity across the floor.
Size Matters
Whilst in general a larger rotor and stator fits a larger machine, it is not just the length and width to consider. The pitch (ridges) on the rotor have an influence on pumping speed and pressure. Rotors with more or deeper pitches will pump at a higher pressure. You will often need greater pressure if you are pumping further and have more hose to get the material through or perhaps are spraying a greater height. If your rotor has a shallower pitch (is less ridged), it will produce a lower pressure as the material slides through more easily with less ridges to navigate. Another element to consider along with the size is the shore or how soft/firm the stator (a higher number indicates a firmer inner tubing). A softer stator is often recommended for coarser material.
What if I fit the wrong Rotor and Stator?
Some machines have the capability for a number of rotors and stators to fit allowing the pump to be more versatile. This means your machine may be able to cope with a range of materials adjusting from render to liquid or latex flow screed with a simple rotor and stator change. A machine such as the Euromair MixPro 28 will give you this kind of versatility. Whilst some machines are compatible with several rotors and stators, it is vital not to fit the wrong rotor and stator to your machine. The incorrect part can cause serious damage to your machine. If you pump a material with aggregate that is too large for the rotor and stator you will potentially cause a blockage. If you don’t act on a blocked machine quickly and wash it out you can cause further problems and damage that can be expensive to repair. Another issue with pumping the wrong product with the incorrect rotor and stator is wear on your moving parts, larger aggregate pushing through a smaller rotor and stator will cause a huge amount of wear. Since these are expensive parts to replace, you don’t want to be replacing your rotor and stator after every single job.
-
Does Re-Rendering Prolong The Life Of A Building?
16 February 2023Rendering your home has a huge number of benefits including the visually pleasing advantages for the budding Grand Designers amongst us. As well as more practical benefits such as protection from harsh weather conditions and making a home more energy efficient. As with most areas of a home whether paintwork, kitchens, bathrooms or carpeting, rendering also has a lifespan and at some point may need some attention or restoration work. Find out if re-rendering really is the key to a home that stands the test of time.
The Benefits of Rendering
Rendering has many benefits both whether you’re looking at it from the perspective of a homeowner or as a builder deciding on how to finish a project. The advantages include:
- One of the simplest ways to give your home a complete transformation and with monocouche available in a range of colours there really is a style to suit all
- The wow factor of render really can increase the value of your property
- There is a variety of finishes to suit all tastes from a contemporary scraped finish to a more characteristic roughcast or pebbledash finish
- Render can hide the less desirable features of a property or ‘ugly’ brickwork
- It gives fantastic weather protection particularly in exposed or coastal areas
- It can be a cheaper and quicker method of building if you build in blockwork followed by applying render through a render spray machine
- Render provides insulation for a home regulating the temperature and making it more energy efficient therefore reducing those costly energy bills.
- It will generally reduce long-term maintenance costs
- Read more on the benefits here >
How long does the render last?
There is no one-size-fits-all response to this question as various renders can perform differently and it can also depend on the structure of the house. BBA certified render will often give a lifespan of 25 years minimum but we’ve seen render lasting between 20-50 years.
The longevity of your render can also depend on the climate; if you are in an exposed or particularly damp area the render will take more of a battering. Find out more about how weather effects render here >. In harsh weather climates, lime or silicone based render will perform better. Modern render systems such as acrylic or silicone-based render have a longer lifespan as they are more flexible and permeable and often are designed with technology to repel water and algae . Cement render (more traditional render) can be susceptible to cracking or breaking off and can experience shrinkage. However traditional render is also pretty easy to repair though will require subsequently repainting unlike through-coloured monocouche renders. If you notice a crack, it is worth acting on it straight away since cracks can open up your property to water damage and cause further problems. You may notice cracks appear after 10 years with cement render however this can also vary according to the application. Always ensure rendering is carried out by an experienced contractor who will prepare the wall correctly and therefore leave it less liable to peeling and cracking. Cement render should be avoided with a timber framed house since they will move more than brick or blockwork so require a flexible render system.
Pebbledash is a particularly hardy type of render and you may stumble across pebbledash properties that are over one hundred years old due to the resilience of this render making it durable and resistant to damage.
How to maintain my render?
Ideally you don’t want to get to the point where you will need to re-render your entire property so maintenance is key. Maintaining your property will pay-off in the long run making it both easier to sell if you come to that stage as well ensuring optimum protection for the walls and structure of your house.
Green algae is often a concern for those with rendered walls
Vegetation growth such as green algae, moss, vines and fungi are often a concern for those with rendered properties. Some renders have now been developed with fungicide and herbicide within their formulas to prevent these unwanted growths. Often these problems will occur more in damp areas, with homes that are north-facing with less direct sunlight or houses with surrounding trees/woodland. Not only is the growth somewhat unsightly but it also encourages further damp which can lead to deterioration in your render. In order to keep on top of your render maintenance, give your property a light jet-wash every now and again (perhaps on an annual basis). A little clean will prevent the build up of algae and mould. You should begin by removing any greenery using a brush before cleaning with a render cleaner such as Weber’s CL150. If you are simply removing stains and looking to freshen up your render you can use a pressure washer and a mild detergent although be aware not to use pressure washers for dry-dash finishes. Always set your pressure washer to the fan setting and not the jet wash which could cause damage. Also do not get too close to the wall with your jetwash as you do not want to penetrate the surface.
There are products that have been designed to add an additional layer of protection to your render particularly if you’re living in an area with a harsher climate. Weber’s Weberend Protect is a highly water repellent product which can be applied by spray, brush or roller. It adds that additional layer of protection and maintains the quality of your render.
Installation of an overhang can help render last longer. An overhang is often an extension of the roof which prevents rainwater running down the render and water entering through gaps. The overhang directs water away from the rendered walls though, in rather wet climates like the UK, can never protect the surface entirely.
Of course maintenance also means acting swiftly on any cracks that may appear. The longer damage is left the worse the problem can become as water is able to seep in which can wreak havoc.
You should quickly act on signs of damage to prevent the situation worsen and the job becoming more costly and time-consuming. Signs of damage to look out for include:
- Cracks (large or hairline)
- Bulging areas
- Blown render (this means hollow render when it no longer adheres to the substrate behind)
- Render that has completely fallen off and exposed the brickwork behind.
- Remember new builds will often be susceptible to settlement cracks due to building movement
The time to be particularly vigilant with render damage is during winter as cold and frosty conditions can quickly cause further problems. When water seeps into a crack during winter it can freeze expanding the crack and even allowing in water between the wall and render. This can then cause a whole area of render to blow loose or even allow water to penetrate into the wall behind causing structural damage. Repairing hairline cracks will save you the much bigger headache of having to repair a large area of blown render. Take a look at our guidance for repairing hairline cracks or patch repairing render here >
Should I repair or re-render?
Unless the entire house has fallen into a state of disrepair and there are clear signs of an inadequate substandard previous render job that is affecting the structural integrity of your home, re-rendering the entire property is probably a last resort. If render is properly applied and maintained as guided above then it really should last decades and only really need minor repairs. However, if you are considering completely re-rendering your home, ensure you find a well-qualified contractor who will carry out the job properly. Things to watch out for include rendering over existing render. Best practice would be to remove the existing render to ensure the structural validity of the brick/blockwork beneath before starting the render process from scratch. Render over render would generally be too heavy and cause the render to fall off and even compromise the house structure beneath.. However, you will sometimes be able to apply a modern render system such as thin-coat silicone render over the existing render but always seek advice from a qualified renderer or render manufacturer.
-
Fancy an upgrade? Find out about the trade-in process at CES
9 February 2023Thinking of selling your machine? Did you know CES do machine trade-ins? Whether you're looking to move a machine on that you no longer use or are just keen to have an upgrade and invest in the latest shiny new model, CES can help you through the process.
How does the Process work?
If you haven't already, check out our YouTube video in which CES General Manager Ben goes through all those frequently asked questions . If you're thinking of trading in your machine, get in contact with us via phone, email or message us on social media. Once we've discussed your machine and have all the relevant details, we'll make you an offer based on the condition, age and number of hours. If you accept this offer, we'll simply ask you to draw up an invoice detailing the purchase price. We can then make payment to your company and take ownership of your machine. This process can be completed in as little as 1 week.
What Machines Do CES Deal With?
At CES we'll deal with a huge range of pumping, mixing and spraying equipment with our general rule being, as long as parts are readily available in the UK, we'll consider your machine for trade-in. We'll accept both new and old models including brands such as Euromair, Putzmeister and Lancy to name a few.
Is A Part-Exchange the Only Option?
There are a number of ways we can arrange your trade in. Firstly, if you're simply looking to just move your machine on, we are happy to consider purchasing your machine from you with no obligation to purchase another machine. Secondly you can part-exchange your machine for one of our new plastering, rendering or flow screed machines. The final option is a part-exchange for one of our second-hand models.
What Details do CES need on my Machine?
The trade-in process can be completed relatively quickly once you've sent over a selection of photos as we can base our offer on these and once the offer is accepted things can progress swiftly. It is important to capture the machine from all angles to gauge the condition of the machine in full. In your email/message please include photos of:
- Pumping Hopper
- The Engine Bay
- Proof of Purchase
- Mixing Hopper
- The Serial Plate
- Hour Meter
- All Four Sides of The Machine
All these details allow us to get a clear picture of the machine as well as understand where it's come from and the life it's lead and therefore give an accurate offer.
What Next?
If a Machine Trade-in with CES sounds like the way forward for you, get in touch with us via phone (01494 715472), email (sales@ces-hire.com) or message us on Facebook, Instagram or LinkedIn, we'll be happy to help.
-
Boost Revenue & Efficiency With Our Painting & Decorating Tips And Tricks
2 February 2023Making the switch from painting by hand to spray machines would have to be our number one tip for boosting revenue and efficiency. However, investing time in planning and preparing for your project, whilst time-consuming itself, will save time in the long-run and improve efficiency in your clean up process. We’ll explore this and more in this painting and decorating blog.
Marvellous Machines
Making the change from hand application to machine spraying is worth investigating. With an experienced hand, spray machines can paint a room in around ten minutes. This super speed allows you to turn around jobs more quickly and therefore take on more projects. The Paint Spray Machine boasts many other benefits including:
- Achieving a superior smooth and even coat
- Light-weight and portable design
- Fantastic health benefits reducing wear and tear on your body
- Ability to spray details (the HVLP is perfect for this) as well as large-scale areas
- Creating a high-quality professional finish with great coverage in just one-pass
Perfect Planning
Whilst “desk-time” seems counterproductive as you might feel like you’re not carrying out actual decorating work, planning saves you time and money on your project overall and ensures you not over-ordering on paints, tapes and films. It also means you won’t end up starting/stopping when you realise you’ve run out of paint or don’t have the ladders you require. When your planning consider:
- How big is the space that your painting is?
- Is it a large area or more details focused?
- What kind of surface will you be covering?
- Do you need any additional tools such as tip extensions or ladders/scaffolding?
- Have you purchased and fitted the correct machine filter and spray tip?
- What protective films and tapes do you require?
Selecting your Paint
Getting your paint right ensuring it is compatible with the surface you are covering as well as your spray machine is important to ensure efficiency when you come to actually carry out the painting itself. Always check the paint specification sheet prior to setting up your machine to select the correct spray tip. Generally the thicker the paint the larger the spray tip needed and thinner paints require a smaller tip. Paint spray machines are generally very versatile machines and will work with most paints including emulsion, latex, varnishes, lacquers, primers amongst many more.
Choosing the Right Filter
Selecting the right filter ensures a professional finish and smooth and more efficient running of your machine since the filter takes out the non sprayable particles. Thicker paints require a coarser filter. Most of our QTech machines are designed with a triple filter to ensure a good quality and smooth finish in one-coat. Often the Suction and manifold filters are specific to the machines, however the gun/pencil filters will vary according to the paint you are using. Choosing the correct filter (according to the paint spec sheet) will prevent problems when spraying and ensure a quicker and more efficient turn-around of your job.
Choosing the Correct Spray Tip
Just as with the filter, getting the spray tip right ahead of beginning painting will prevent issues later. Tips are selected according to the coating you are using as well as whether you need it for precision work or large surface coverage. The spray tip controls how much paint is projected from the gun and the fan pattern produced. Getting the tip correct reduces paint wastage and project cost therefore increasing overall revenue. As a brief overview, lighter coatings will need a smaller tip and thicker materials require a larger tip. Find out more about how to pick the correct spray tip here >
Preparation
Even if you want to simply crack on with the job and find prep work frustrating, careful preparation is vital and will make the painting process easier and save time in the clean up. Our top three products for preparation efficiency would be
-
Painters Masking Tape-Always opt for the best quality you can as it will be designed with innovative technology to achieve crisp, clean lines and prevent paint seeping. Check out this blog for our top tips when using painters tape >
-
Drop Film-This pre-taped film is ideal for covering large areas (floors, walls, furniture) that you wish to protect from paint overspray.
-
Window Protection- Our blue glass protection roll will work on window, glass and other smooth surfaces to quickly cover and protect these areas from paint.
Practise Makes Perfect
Once everything is set up and your area is prepared, it is always worth perfecting your spray technique and checking your fan pattern on a piece of scrap card. Our top tips to achieve that perfect technique include:
- Remaining a consistent distance from the surface (10-25cm) to avoid unsightly drips or tailing
- Spraying using long continuous passes maintaining the gun at a 90 degree angle without swinging it
- Triggering the spray gun after beginning each stroke and releasing it whilst your arm is still moving at the end. This will prevent paint build up.
- Overlapping each pass by 30-50% to ensure a seamless blend.
- For further tips check out this blog >
-
Celebrating the life of Co-Founding CES Director
31 January 2023A Tribute to Alma Rogers
40 years ago, Dennis and Alma Rogers founded Construction Equipment Services (which transitioned to CES Hire in July 2003). This year, whilst we mark the start of a year of celebrations for our 40 years in business, we also take the opportunity to pay tribute to Alma Rogers who sadly passed away before Christmas.
Family Business
CES Hire has been a family business since opening on January 10th 1983. It was set up by Dennis and Alma Rogers and their son Nick Rogers also became a director in 1994. Many of you will know Nick who remains a CES director now. Nick's daughter Jessica also joined the CES team as a marketing administrator in 2018. Alma continued as a director for an amazing 29 years, resigning in May 2012. Some of our longstanding customers may remember seeing Alma in the offices at Binders Industrial Estate as she managed the accounts for many years.
Remembering Alma
Alma celebrated her 90th birthday in July 2022, marking this incredible milestone with her son and daughter and their families including 6 grandchildren and 5 great-grandchildren. In her 90 years she created some wonderful memories which will forever be cherished. Alma sadly passed away on December 19th 2022 and will be greatly missed by her loving family.
A worthy Charity
A year ago, CES ran a charity campaign to raise money for Tadley Elderly Day Care. The Centre played an important role in the last few years of Alma's life since she attended the Centre twice a week. Nick says “The staff are such lovely caring people who are doing this because they passionately care about helping others and this in turn allows their carers a much-needed break. This is the ethos of the day care centre; keeping people at home as long as possible. The staff play games, supply teas, cake, a hot meal and keep the elderly men and women entertained throughout the day." Alma absolutely loved her days at the Centre and whilst as a company we raised a brilliant £1,000 for them last year, together with the family, we endeavour to raise even more now. Any donations will be gratefully received to support a charity that meant such a lot to Alma and her family.
Leaving a Legacy
Alma was the epitome of a life well-lived and she lives on through the treasured moments and memories held by her family. Raising money for Tadley Elderly Day Care allows her to leave a legacy and supports the Centre in continuing their wonderful work helping many other families and their loved ones. Please find the link to donate here https://almarogers.muchloved.com/Fundraising
-
How Does a Flow Screed Pump Work?
31 January 2023Flow Screed pumps are a machine of the moment as contractors switch from back-breaking traditional screed to an easier method of working which achieves fantastic level, even and smooth flooring surfaces. Rapid pour Liquid Flow Screed has many benefits including it’s compatibility with a range of floor finishes, time-saving, labour-saving and increase in productivity. Find out more about the benefits of using liquid flow screed here >
Safety First
As with any machine, it is important to draw the users attention to the manual and pay close attention to the safety points. Accidents and injuries often happen due to ignoring safety standards so always invest the time reading and understanding the safety guidelines. A more detailed run through of safety protocol when operating a liquid flow screed pump can be found here >
Pre-use Checks
The actual operation of a flow screed pump is pretty simple and there are arguably more steps to remember in your preparation as opposed to the running of the machine. It’s well worth checking out this blog which gives you top tips for getting started with latex or flow screed > . Before you begin pumping follow these steps (all machines are different and these steps refer to our Euromair X-Pro D140):
-
Check the hydraulic and engine oil levels
-
Ensure there are no objects in the hopper (e.g. a rogue trowel or spanner)
-
Ensure machine stability by lowering/raising the jockey wheel or placing onto legs if they are fitted
-
Unlock the emergency stop button on the hood
Time to Pump
At CES, 20 metres of hose is supplied as standard which generally achieves the best results. However sometimes you may need more to suit your project. With more hose you might discover the flow rate reduces as the pressure in the hoses drops so appropriate adjustments should be made. Before firing up the machine, you should also be aware never to use incorrect fuel (in this case with a diesel machine, stay away from petrol) and also never to run the pump without water. Now it’s time to pump. With a machine like the D140, we would follow these steps:
-
Turn the ignition key to the on position and wait for it to light up
-
Once the preheating (glow plug) lights go off start up the the engine using the ignition key
-
Run the machine for 5-10 minutes on tick over (low revs) to allow it to warm up
-
Fill the hopper with approximately 30 litres of water and a dash of washing up liquid
-
Connect the product hose to the pump outlet
-
Turn the pump rotation control switch to forward position with the speed at ¼ speed
-
Prime the hose by running water through it. Be sure to empty the hoses of water prior to pumping. This will ensure the screed is not watered down. .
-
Empty the leftover water in the hopper by opening the wash out bung
-
Pour your ready-mix from the truck directly into the hopper and off you go.
-
Use the flow rate dial on the control panel to adjust accordingly.
Behind the Scenes Machine Mechanisms
Essentially when you use a liquid screed pump it is as simple as switching on the machine, pouring from the ready mix truck in the hopper, adjusting the flow rate and allowing the screed to pump through the hose to the desired level as set up on your levelling tripods. The machine really does the hard work for you, however there are some behind the scenes mechanics that enable your flow screed pump to work. The magic really lies in the rotor stator technology which is working away in the background. Rotors and stators are the mechanisms behind many of our machines. Product (mortar, plaster, grout, cement) is directed through the rotor and stator by a cardan shaft. The rotor (spiralled steel shaft) creates conveying chambers inside the rubber tubing that lines the inside of the stator (the stationery element of the device). The conveying chambers move in the direction of flow and create a continuous flow which pushes the material through the hose and out onto the surface. Different rotors and stators achieve varying speed and pressure results and should be selected depending on your material and aggregate size.
-
-
Safety First: All You Need to Know About Remaining Safe Using a Flow Screed Pump
31 January 2023As with any kind of machine, it is important to take notice of the safety precautions to prevent accidents and injuries. With big diesel units such as our flow screed pumps, you should always refer to the specific user manual to ensure you are operating the machine safely. When machines are working under pressure and using highly flammable fuel, you must follow the safety guidelines carefully. Below we have put together some key information to ensure you remain safe whilst operating your flow screed pump.
Ready, steady, go!
Before you hit that ‘go’ button or turn the ignition key, ensuring the correct and proper setup is incredibly important for the safe operation of your machine. Remember that anyone who comes into contact with the pump should have been briefed on the specific guidance from the user manual, that includes staff transporting, using and cleaning the machine. Use these steps as a guideline:
- Always transport machines correctly using the appropriate handles and grips
- Keep a clean and clear workspace, free from obstacles and debris that become tripping hazards
- People not using the machine should remain clear
- Ensure no flammable objects are close to the machine
- Set up the machine on a level surface, making sure the jockey wheel (if fitted with one) is placed to stabilise the machine to avoid tipping
- Inspect the product delivery hoses prior to use, looking for wear or damage that could lead to a hose blowing and causing injuries
- Never walk on product delivery hoses or use them to manoeuvre the machine
- Be clear of where the ‘emergency stop’ button is located
Running your Pump
Once your machine is set up correctly, it is time to pump. When operating any machine, you should always wear appropriate PPE which includes safety glasses/googles, gloves, mask, overalls and safety boots. The following is some generic guidance on remaining safe whilst the pump is running:
- Ensure your application is supported by the machine
- Make sure there is at least 50 cm of clear space between equipment and obstacles so as not to block the air flow
- Use an appropriate lubricant to prevent material sticking to working areas of the pump
- Never run the machine if you have noticed problems
- Never run the machine unattended
- Do not touch warm surfaces or moving parts
- Never insert your hand or another object inside the safety grill
- Always switch off the machine when you stop for breaks and make sure the pressure is released before cleaning or adjusting the machine
- Always remain alert whilst using machinery and never operate under the influence of alcohol or other substances that could affect your reaction speed
After-Care
Machine maintenance is crucial to keep your pump operating at the optimum level as well keeping wear-parts in tiptop condition which in turn ensures the machine is working safely. Here are our top-tips for safety in machine after-care:
- Clean after every use
- Only use genuine spare parts
- Grease the pump after use to avoid blockages which can cause damage
- Never modify a machine or cut/dismantle safety components such as the safety grill
- Always store in a clean and clear area